
Walking the course is one of the best parts of the game, but let's be honest—wrestling a heavy push cart up and down hills can completely drain your energy and focus. An electric golf push cart conversion kit is the smartest way to motorize the cart you already own and love, saving your stamina for the game itself without the hefty price tag of a brand-new electric caddy.
Why Upgrade Your Push Cart Instead Of Replacing It
You’ve probably seen them—golfers gliding effortlessly up steep fairways, their carts moving as if by magic. The first thought is usually, "Wow, they must have spent a fortune on that thing." But there's a much more practical and budget-friendly path to that same experience: simply upgrading the push cart you already know and trust.
An electric golf push cart conversion kit, like the Caddie Wheel, is designed for exactly this. It perfectly bridges the gap between manual labor and a major new purchase. This isn't just about slapping a motor on your cart; it's a strategic move that enhances your game in a few very real ways.
The Smart Financial Move
The most obvious win here is the cost. A new, fully-featured electric caddy can easily set you back anywhere from $1,000 to over $2,500. A conversion kit, on the other hand, gives you the core benefit—motorized power—for just a fraction of that price. You get all the hill-climbing, energy-saving convenience without the big hit to your wallet.
This approach is catching on fast. The global electric golf push cart market, a key indicator for conversion kits, was valued at USD 0.32 billion in 2024 and is expected to grow significantly. That boom shows just how many golfers are looking for an easier walk without having to replace their gear.
Keep The Cart You Already Love
Your current push cart is familiar territory. You know exactly how it folds, how it balances with your specific bag, and where every accessory fits perfectly. Why mess with a good thing? A conversion kit lets you enhance the equipment you’re already comfortable with. No need to learn a new folding mechanism or figure out where to stash your rangefinder.
The Caddie Wheel's drop-on design means you can motorize your cart in minutes, not hours. It’s an instant upgrade that respects the gear you’ve already invested in.
This familiarity makes the switch feel completely seamless. You're just adding power to a system you already use, making the entire experience intuitive from the very first round. You can dive deeper into the benefits by exploring these top reasons to invest in a push cart conversion kit.
Preserve Your Energy For The Game
Every golfer knows the feeling. Late-round fatigue sets in, and suddenly your swings get sloppy and three-foot putts look impossible. Pushing 30-40 pounds of gear over five miles, especially on a hilly course, takes a serious physical toll. This is where an electric conversion kit really shines.
By letting a motor handle the heavy lifting, you save that precious physical and mental energy for what actually matters: your shots. Imagine walking up to the 18th green feeling just as fresh as you did on the first tee. That’s not a luxury—it’s a real competitive advantage that can help you finish rounds strong and shave strokes off your score. It truly transforms the walk from a chore back into a refreshing part of the game.
Conversion Kit vs New Electric Caddy: A Quick Comparison
Still weighing your options? Here’s a breakdown of the key differences between upgrading with a Caddie Wheel conversion kit and buying a whole new electric caddy.
| Consideration | Caddie Wheel Conversion Kit | New Electric Caddy |
|---|---|---|
| Cost | Significantly lower, typically a fraction of the price. | High initial investment, often $1,000 to $2,500+. |
| Familiarity | Uses your existing cart, so no learning curve. | Requires learning a new folding mechanism and setup. |
| Installation | Quick and simple, often taking just a few minutes. | No installation needed, but setup can be complex. |
| Portability | Adds minimal weight; can be detached for transport. | Often heavier and bulkier, taking up more space. |
| Features | Provides the core benefit: motorized assistance. | May include extra features like remote control or GPS. |
| Customization | Enhances the cart and accessories you've already chosen. | Limited to the features and design of the specific model. |
Ultimately, a conversion kit gives you the biggest bang for your buck by delivering the power you need without forcing you to abandon the cart you’re already perfectly happy with.
Is Your Push Cart Ready For An Upgrade?
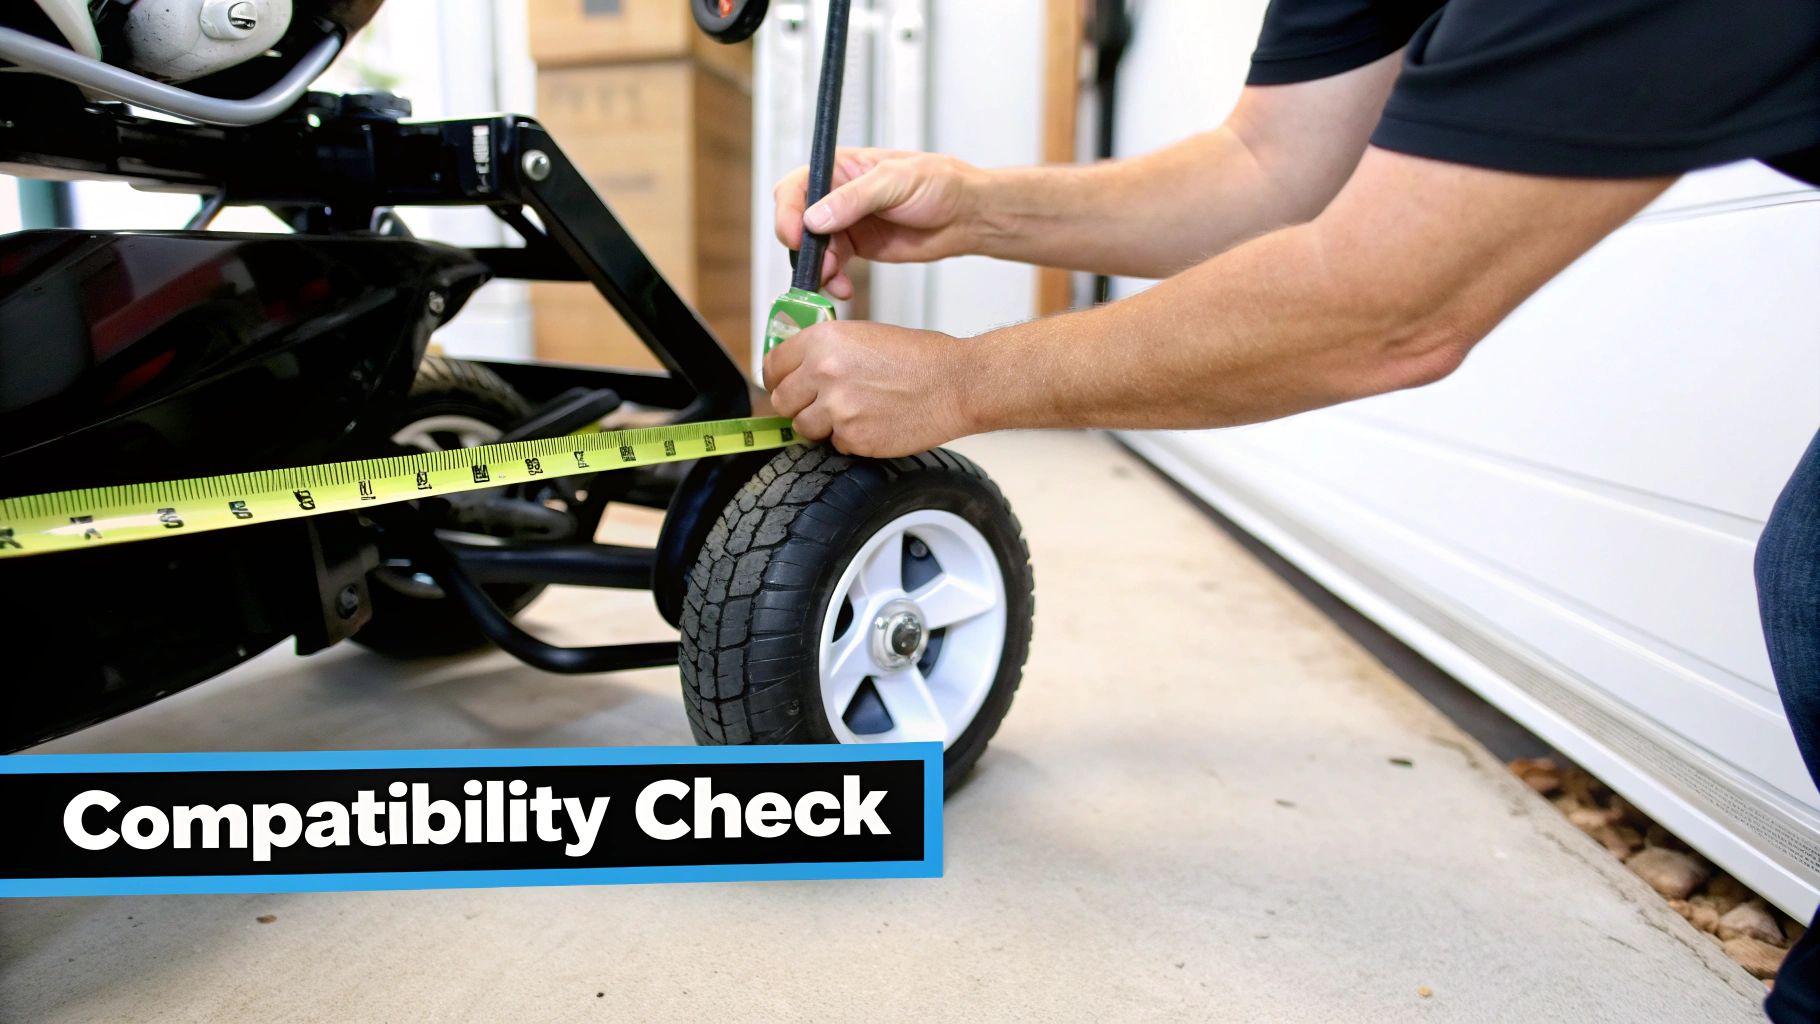
Before you start dreaming of effortless climbs up those steep fairways, it’s smart to give your current push cart a quick pre-flight check. While an electric golf push cart conversion kit like the Caddie Wheel is built for near-universal compatibility, a few key details will tell you if your cart is a prime candidate for this game-changing upgrade.
Taking five minutes now to look over your cart will guarantee a smooth installation and flawless performance on the course. Think of it like a fitting for a new driver—you want to make sure everything lines up perfectly. We're just making sure the Caddie Wheel's snap-in bracket and motor have the room they need to work without a hitch. You don't need an engineering degree, just a tape measure and a good eye.
This hands-on check ensures your investment pays off from the very first round. It's no wonder these upgrades are booming, with the golf push cart market projected to hit USD 1,160 million by 2033, and the broader electric golf vehicle market set to reach USD 2.58 billion globally in the same period. You can learn more about these market trends and how they’re shaping golf tech.
The All-Important Axle Inspection
The single most critical spot to check is your cart's rear axle. This is where the magic happens, as it's the mounting point for the Caddie Wheel's universal bracket. The good news is that most modern three- and four-wheel carts from brands like Clicgear, Bag Boy, and Sun Mountain feature a simple, straight axle that’s perfect for this kind of upgrade.
Start by flipping your cart over or laying it on its side to get a clear look. You're searching for a relatively straight and open axle bar between the two rear wheels. Some carts have funky suspension systems or oddly shaped frames that might get in the way.
Pro Tip: Grab your phone and snap a quick picture of your cart's axle area. Comparing it to the installation photos on the product page can often give you an instant visual confirmation of compatibility.
Pay close attention to any brake cables or folding mechanisms near the center of the axle. The Caddie Wheel bracket needs a clean section of the axle to clamp onto securely. If cables are running right where the bracket needs to go, it might make for a tricky installation.
Measuring For Clearance And Fit
Once you’ve confirmed the axle is good to go, the next step is checking for clearance. The motorized wheel unit needs enough space to spin freely and move as you navigate the course. It’s a tough unit, but it can’t be jammed up against your cart's frame or the bottom of your golf bag.
Here are the key measurements you’ll want to take:
- Ground Clearance: Measure from the bottom of your axle to the ground. You need enough room so the motorized wheel isn't dragging on uneven turf.
- Frame Clearance: Check the space directly above and behind the axle. Is there at least a few inches of open space for the motor housing to sit comfortably?
- Bag Clearance: Throw your golf bag on the cart and make sure the bottom doesn't sag down into the area where the Caddie Wheel will be.
This quick check prevents any surprises down the road. You want that wheel to have totally unobstructed movement, ensuring it can deliver consistent power without rubbing against any part of your cart or bag, especially when making tight turns or rolling over bumps. A successful installation is all about this simple spatial relationship.
Your Caddie Wheel Installation Walkthrough
This is where the magic happens. Forget those dense, confusing technical manuals—think of this as me walking you through the entire process right in your garage. An electric golf push cart conversion kit like the Caddie Wheel is designed to be ridiculously simple, and you’re about to see just how fast you can motorize your cart.
The clever engineering here means you won't need a specialized tool chest, an engineering degree, or a whole afternoon blocked off. For most golfers, the entire installation takes less time than hitting a bucket of balls at the range. We’ll break it down into a few simple stages to get you rolling.
Preparing Your Cart And Workspace
Before you even open the box, a little prep work goes a long way. Find a clean, flat spot like your garage floor or driveway. This gives you plenty of room to lay everything out and move around the cart without tripping over anything.
Next, give your push cart a quick wipe-down, paying close attention to the rear axle and frame. Clearing off any dried mud, grass, or grime is a non-negotiable step because it ensures the universal snap-in bracket gets a clean, secure grip. A solid connection here is the foundation for everything that follows. Mastering this kind of systematic assembly is key for any motorized equipment; in fact, insights from a complete guide for treadmill setup show just how vital a prepared space and methodical approach are for long-term performance.
Securing The Universal Snap-In Bracket
The bracket is the heart of the Caddie Wheel system. It’s what allows the motorized wheel to pop on and off in seconds. Your goal is to get it attached securely to the center of your cart's rear axle.
Go ahead and lay your cart on its side to get easy access. Position the bracket, making sure it’s perfectly centered between the two rear wheels. This is critical for balance and makes sure the cart tracks straight when the motor kicks in.
My Personal Tip: Don't crank the bolts all the way down at first. Snug them up so the bracket stays put, but leave just enough play to make minor adjustments. Once you're positive it's dead center, then you can tighten them down fully, alternating between the bolts for even pressure.
This single piece of hardware is what makes the Caddie Wheel so versatile, letting it fit a huge range of popular three and four-wheel carts. Taking an extra minute to get its placement just right is time well spent.
The Satisfying Drop-On Motorized Wheel
With the bracket firmly in place, it’s time for the best part of the installation. Pick up the Caddie Wheel motorized unit and align it with the snap-in bracket you just installed.
Simply lower it straight down. You’ll hear and feel a solid 'click' as it locks into place. That audible confirmation tells you the wheel is secure and ready to roll. There’s no complex wiring or fiddly connections to mess with here—the power contacts are built right into the bracket and wheel unit.
To remove it for transport or storage, you just press the release button and lift it off. This brilliant drop-on design is what makes the system so practical for everyday use. You get all the power of an electric caddy with the grab-and-go convenience of your regular push cart.
Positioning The Remote Control Holder
The final step is putting the remote control holder where it feels most natural for you. Most golfers clip it right onto the handle of their push cart, just next to one of the grips.
This keeps the remote within easy thumb-reach, letting you adjust speed, reverse, or brake without missing a beat. The holder uses a simple clamp you can tighten by hand.
Think about these placement options:
- Next to your dominant hand: This feels the most intuitive for most people.
- In the center of the handle: A good spot if you have a scorecard or GPS holder there already, creating a little command center.
- On a vertical frame tube: Some golfers prefer this if the handle is too crowded.
Play around with a few spots before you fully tighten it down. Once you find that sweet spot, you’re officially done. You've just turned your manual cart into a remote-controlled caddy. For an even more detailed look at the process, our easy DIY guide on how to convert a push cart to electric offers more tips and visuals.
That’s it. You're now ready to charge up the battery and experience a whole new way to walk the course.
Mastering Your Motorized Cart On The Course
Alright, you've got your electric golf push cart conversion kit installed, and the hard part is over. Now, it's time for the real fun: taking your new setup from the garage to the fairway and truly getting the hang of it. Think of the remote control as a new club in your bag. Just like any club, learning its feel and function will eventually make operating your Caddie Wheel second nature, turning your walk into a seamless part of the game.
It's no secret that electric mobility is taking over the golf course, and you're now part of that trend. The numbers don't lie—the global electric golf cart market was valued at a whopping USD 1.7 billion in 2024 and is expected to grow at an impressive 8.7% CAGR through 2034. North America is really driving this, holding a 56% market share, with the US alone accounting for an estimated USD 778 million in 2024. If you're curious, you can discover more insights about the booming electric golf cart market and how it’s changing the game.
Dialing In Your Perfect Walking Pace
The first skill to master is matching the cart's speed to your own walking stride. It’s easy to get excited and crank it up, but the real goal is to have it be an effortless companion, not something you're chasing down the fairway.
Start on the lowest speed setting. Gradually bump it up until the cart is moving just a touch ahead of you, so you don't have to put any effort into keeping up. This is about more than just comfort; it’s about being smart with your battery. Running the motor at a steady 70-80% of its max speed is way more efficient than constantly stopping and starting at full blast. Once you find that sweet spot, you can keep that pace from the first tee to the 18th green, saving your energy for the swing and your battery for a full 36 holes.
This simple, three-phase visualization shows the core installation process, setting the stage for on-course mastery.
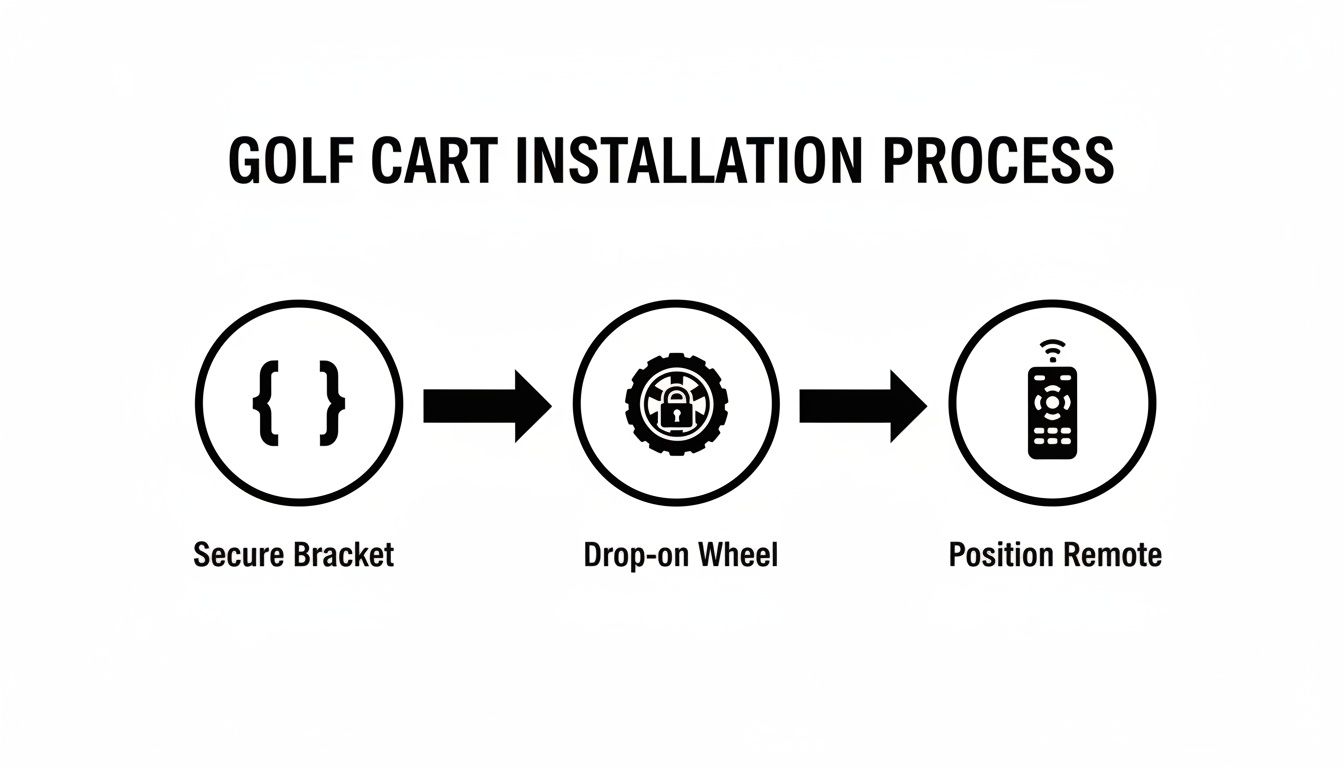
As you can see, the secure bracket, drop-on wheel, and accessible remote create a system that's designed to be intuitive right out of the box.
Real-World Scenarios And Remote Control Tactics
Your remote is so much more than a speed dial—it's your command center for navigating the course. Getting comfortable with all its features is what will truly unlock the potential of your conversion kit.
A quick reference guide like this can help you match the remote's functions to common situations you'll face every round.
| Situation | Recommended Remote Action | Why It Helps |
|---|---|---|
| Steep Uphill Fairway | Increase speed before the incline | Maintains momentum and prevents motor strain for a smooth climb. |
| Navigating Tight Spots | Use the reverse function | Avoids wrestling the cart manually around bunkers or trees. |
| Steep Downhill Path | Engage the electronic brake | Prevents the cart from running away, ensuring a safe and controlled descent. |
| Approaching the Green | Slow down and park strategically | Positions your bag for an easy club selection without getting in the way. |
By mastering these simple actions, you're not just moving a cart; you're managing your game more efficiently.
A great pro tip: Once you're comfortable, send your cart ahead to the next tee box while you and your partners walk off the green. It’s a small touch that really speeds up the pace of play and makes your whole round feel smoother.
Making The Remote An Extension Of Your Game
Ultimately, you want to get to a point where using the remote is an afterthought. Clip it to your cart's handle or your belt and practice making tiny adjustments without breaking your stride. Send it ahead on a long par-5, call it back if you realize you grabbed the wrong club, and park it perfectly next to the green every time.
This level of control frees you up to focus completely on your shot selection and course strategy. You're no longer physically or mentally bogged down by your gear. The walk between shots becomes what it's supposed to be: a moment to relax and think. With a little practice, operating your motorized cart will feel just as natural as pulling a 7-iron from your bag.
Battery Care And Maintenance For Lasting Performance
Your Caddie Wheel is built to be a reliable partner on the course, but just like any high-performance gear, a little smart care goes a long way. Consistent maintenance is the key to making sure your electric golf push cart conversion kit delivers peak power and longevity, season after season.
Think of it this way: you wouldn't head out for a round with dirty clubs or worn-out grips. Applying that same mindset to your cart's power source and hardware protects your investment and prevents frustrating issues on the back nine. These simple habits take just a few minutes but pay huge dividends in performance.
Mastering Your Lithium Battery Charging Routine
The lithium-ion battery is the heart of your Caddie Wheel, and its health is directly tied to how you charge it. This isn't just a suggestion; it’s the single most important factor in maximizing its lifespan and ensuring you get a full 36-hole range every single time.
The golden rule is to charge the battery after every single round. It doesn't matter if you only played nine holes and the indicator shows plenty of juice left. Plugging it in keeps the battery cells balanced and in optimal condition, preventing the slow degradation that happens when a battery sits partially discharged.
Always use the charger that came with your Caddie Wheel. Third-party chargers might seem convenient, but they aren't calibrated for your battery's specific voltage and chemistry, which can easily lead to overcharging and permanent damage.
Quick Two-Minute Maintenance Checks
Beyond the battery, a few quick physical inspections can catch small issues before they turn into real problems. This is the perfect thing to do as part of your post-round routine while unloading your gear.
- Clear The Wheel Tread: Take a second to clear any mud, grass, or small stones from the wheel’s tread. A clean tread gives you better traction and reduces unnecessary strain on the motor.
- Inspect The Bracket: Give the universal snap-in bracket a gentle wiggle. It should be completely snug and secure against the axle. If you feel any play at all, grab a wrench and tighten the bolts.
- Check The Connections: Glance at the power contacts on both the wheel unit and the bracket. Keep them clean and free of debris to guarantee a solid electrical connection every time you drop the wheel on.
This entire process takes less than two minutes but is incredibly effective at ensuring reliable performance. For a deeper dive into power management, our comprehensive guide to golf cart battery maintenance offers even more expert tips.
Smart Off-Season Storage For Your Battery
When it's time to put the clubs away for the winter, how you store your Caddie Wheel battery is absolutely critical. Leaving it on the charger for months or storing it completely empty can seriously harm its long-term health.
For long-term storage, the sweet spot is a partial charge—somewhere between 50% and 70%. This reduces stress on the battery's internal components. Find a cool, dry place away from extreme temperatures, like a closet or a shelf in your garage. Never leave it in a freezing shed or a hot attic.
Set a calendar reminder to check the charge every month or two and top it back up to that 50-70% range if needed. This simple step ensures that when spring arrives, your battery will wake up healthy and ready to go the distance.
Your Top Questions Answered
Even after seeing all the benefits, it's totally normal to have a few questions before you decide to pull the trigger on an electric golf push cart conversion kit. I get asked the same handful of things all the time, so let’s clear them up right now. These aren't just canned answers; they come from countless rounds on the course and feedback from golfers just like you.
How Tough Is The Caddie Wheel To Install On My Cart?
Honestly, it’s ridiculously simple. And that’s not just marketing talk. The vast majority of golfers get it attached and ready for the first tee in under 10 minutes.
You don’t need a toolbox full of specialized gear, and there's no complex wiring to figure out. The main part of the job is just tightening a few bolts to secure the universal bracket onto your cart's rear axle. Once that's on, the motorized wheel unit just drops right in and locks into place with a solid click. It’s a genuine DIY upgrade that anyone can handle with ease.
Will This Actually Fit My Cart?
This is the big one, and the answer is almost always a resounding yes. The Caddie Wheel was engineered from the ground up with a universal snap-in system designed to work with the overwhelming majority of three- and four-wheel push carts out there today.
The only real requirement is having enough clear space around that rear axle for the bracket and wheel to do their thing. It’s a perfect match for the most popular brands you see all over the course.
- Clicgear: Fits like a glove on most models.
- Bag Boy: High compatibility across their entire lineup.
- Sun Mountain: You’ll find it works seamlessly with most of their carts.
The compatibility checklist we covered earlier is your best resource here. Just take five minutes to look over your cart, and you'll know for sure if you’re good to go before you even think about buying. It takes all the guesswork out of the equation.
Here's a solid rule of thumb: if your cart has a simple, straight bar for a rear axle, you’re very likely in business. That universal design is what makes this such a game-changer for so many golfers using the gear they already own.
How Much Weight Does This Thing Add?
A totally fair question. Nobody wants to swap the fatigue of pushing their cart for the struggle of lifting a heavy beast into their car. The Caddie Wheel unit was built to be incredibly lightweight, adding very little bulk to your setup. Getting it in and out of your trunk is still a breeze.
Better yet, the design is super efficient. If you ever need to turn the motor off and just push it manually, the wheel free-spins with almost zero resistance. It won’t feel like you’re dragging a dead motor behind you. When it's on, of course, it does all the work, making a fully loaded bag feel practically weightless, even when you're heading up a steep fairway. The goal is to slash your effort on the course, not just move it somewhere else.
What If I Lose The Remote During A Round?
This is a great question because it shows you’re thinking about real-world situations. We’ve all misplaced something small during a four-hour round, but this is one scenario you won't have to worry about.
Every single Caddie Wheel electric golf push cart conversion kit comes with a free extra remote control. This isn’t an upsell or an add-on; it's included right in the box. Both remotes are already paired to your wheel unit, ready to go from the moment you unbox them.
Here’s my personal pro tip for managing them:
- Clip one remote to your belt loop or the cart’s handle for easy access while you play.
- Tuck the spare remote into the valuables pocket of your golf bag and leave it there.
That way, if you accidentally drop one near the green or it falls out of your pocket, you just grab the backup and keep playing. No slowing down your group, no searching through the rough. It's a simple, smart solution that offers total peace of mind.
Ready to transform your walk and save your energy for what really matters? The Caddie Wheel makes upgrading your push cart simple, affordable, and quick. Learn more and get yours today at https://caddiewheel.com
Share:
8 Actionable Tips for Senior Golfers to Play Smarter in 2025
7 Best Golf Push Cart Options for Every Golfer in 2025