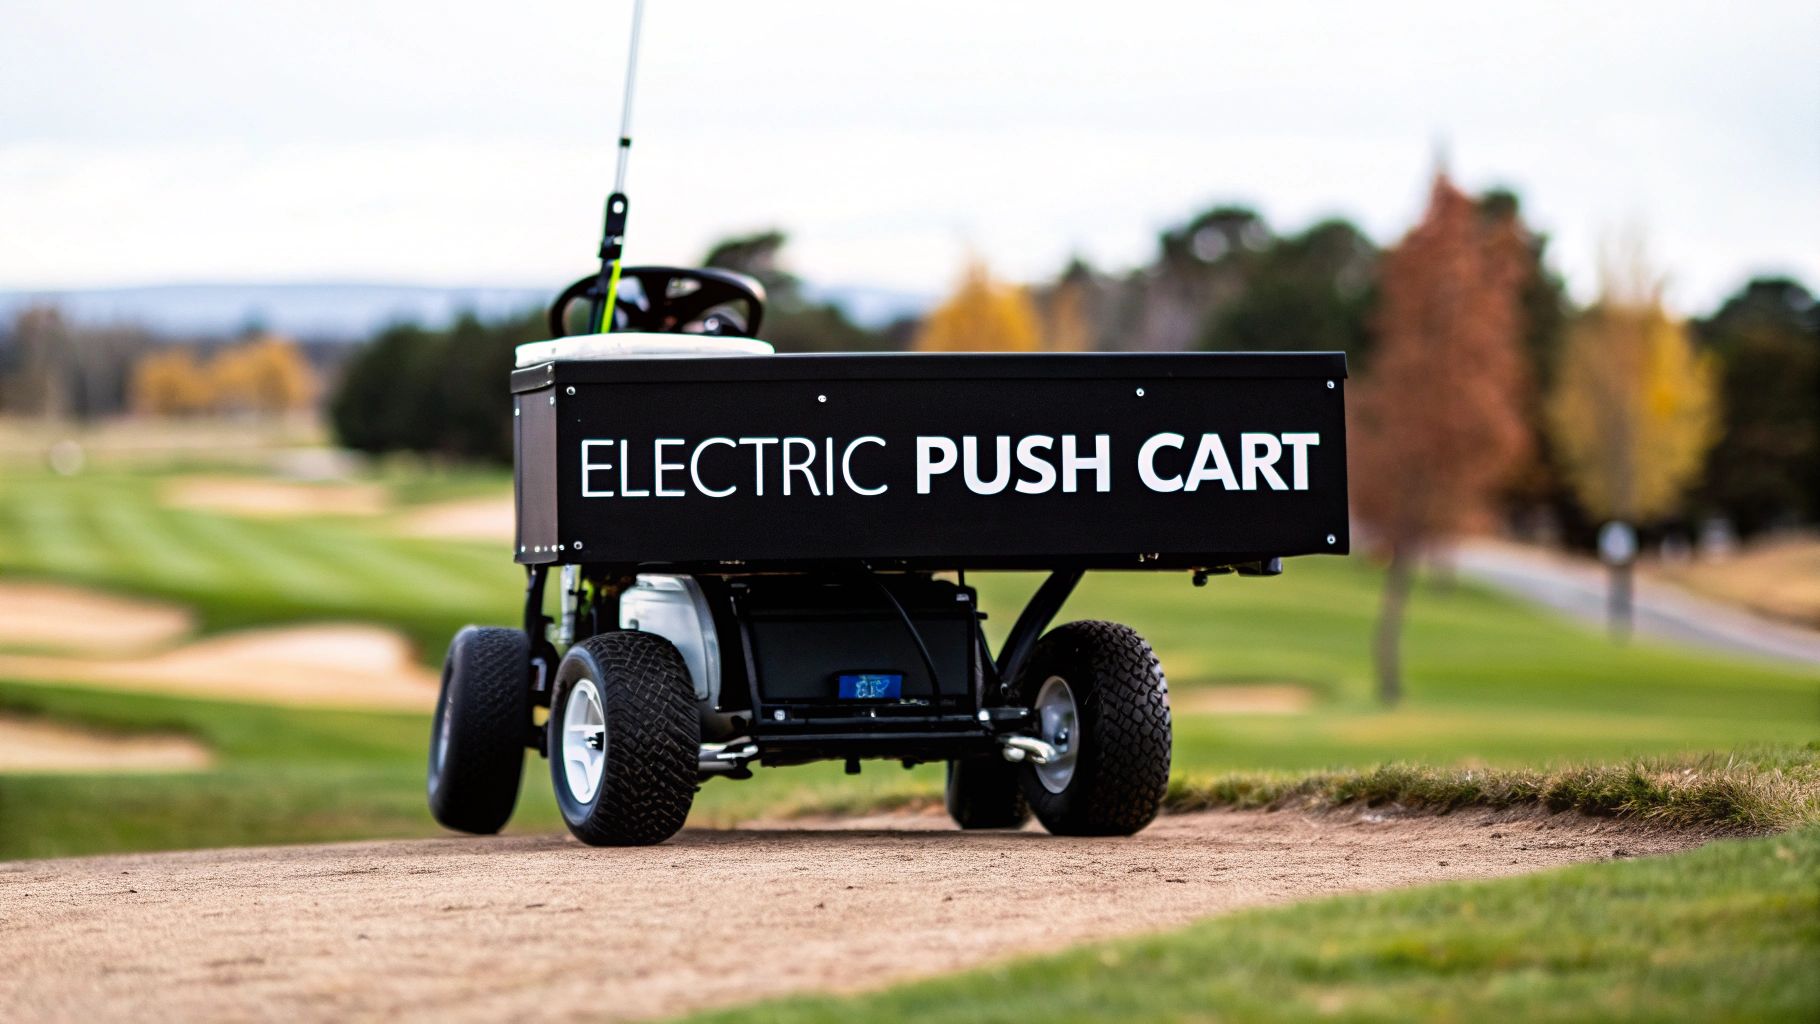
A golf push cart electric conversion kit is exactly what it sounds like: a smart upgrade that turns your trusty manual cart into a motorized caddy. It lets you walk the course and enjoy the fresh air, but without the grunt work of shoving your clubs up every hill. Think of it as getting all the perks of a high-end electric trolley but for a fraction of the cost—a clever way to save your energy, sharpen your focus, and make hilly courses feel like a walk in the park.
Why Upgrade Your Manual Push Cart
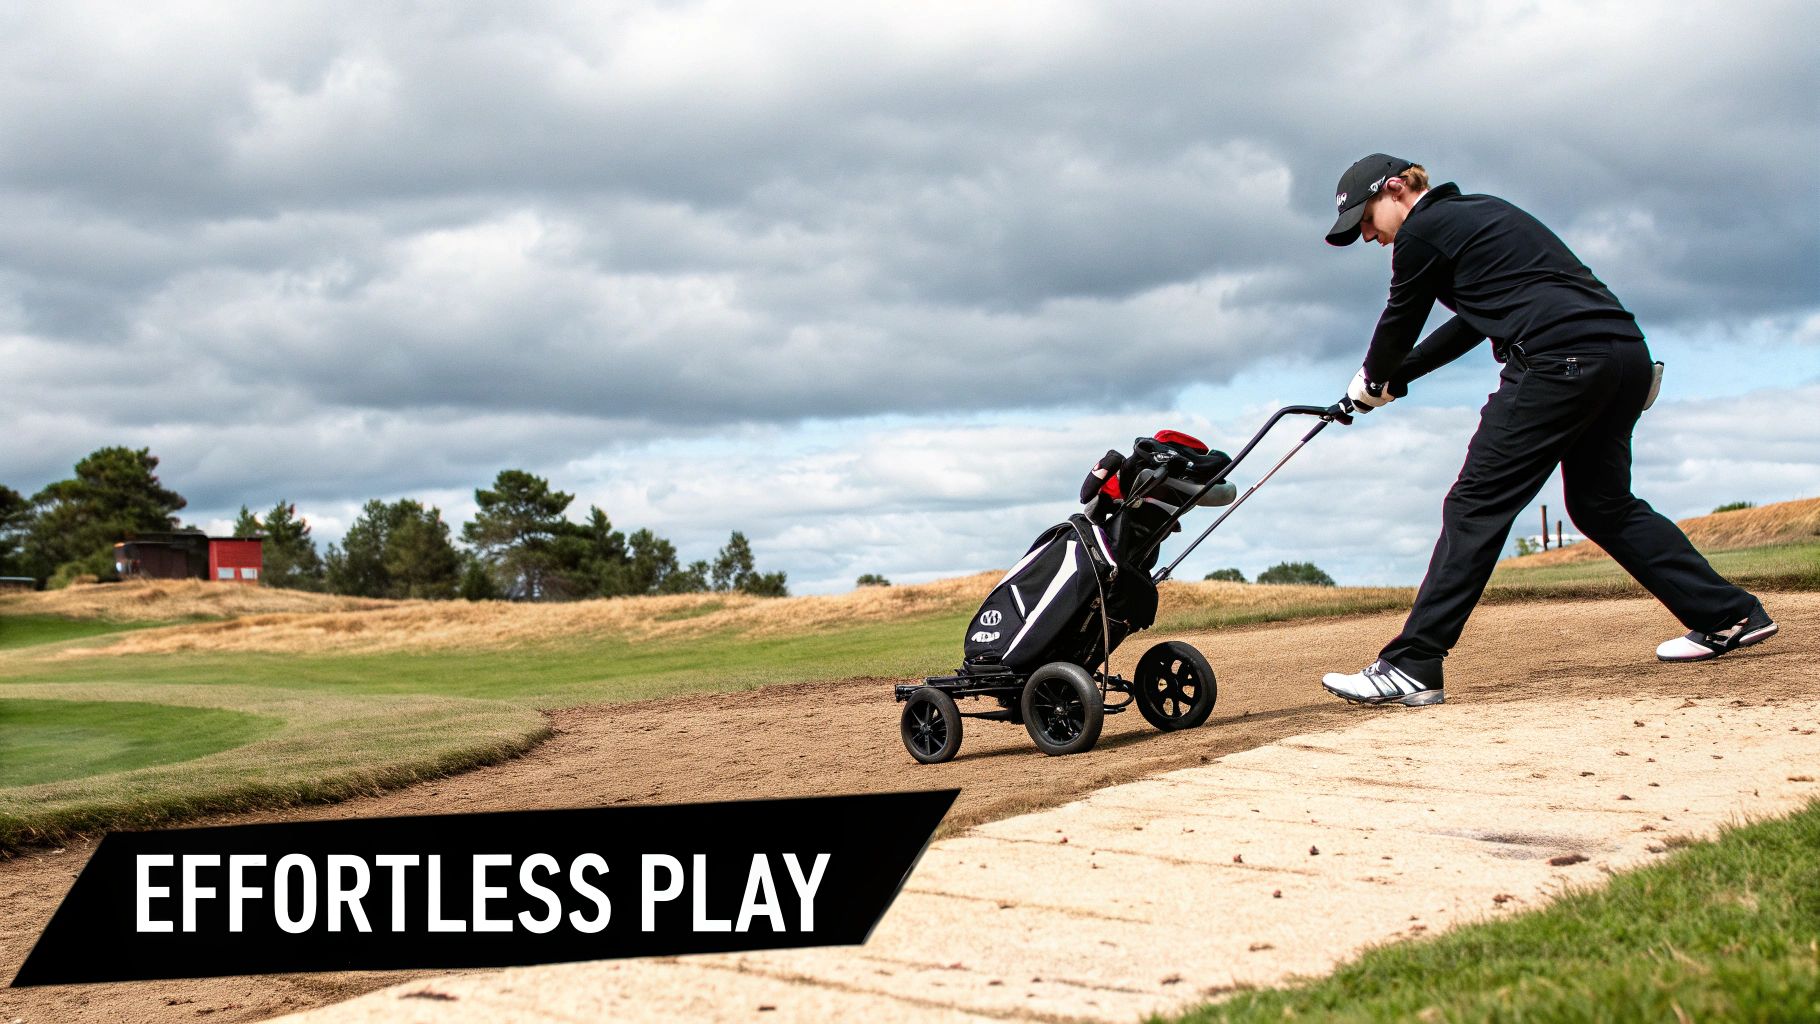
Let's be real—pushing a fully loaded cart up the 18th fairway can leave you gassed. That's precisely the energy you need for that final, must-make putt. This is where a conversion kit completely changes the game. It transforms what can be a physically demanding slog into a relaxing stroll between shots. It’s not just about making things easier; it’s about preserving your stamina so you can finish your round as strong as you started.
Imagine tackling a hilly course without even breaking a sweat. That's what an electric conversion kit brings to the table. The motor does all the heavy lifting, freeing you up to concentrate on your next swing. It’s a simple upgrade that lets you soak up the health benefits of walking without the exhaustion, making golf more enjoyable for players of every age and fitness level.
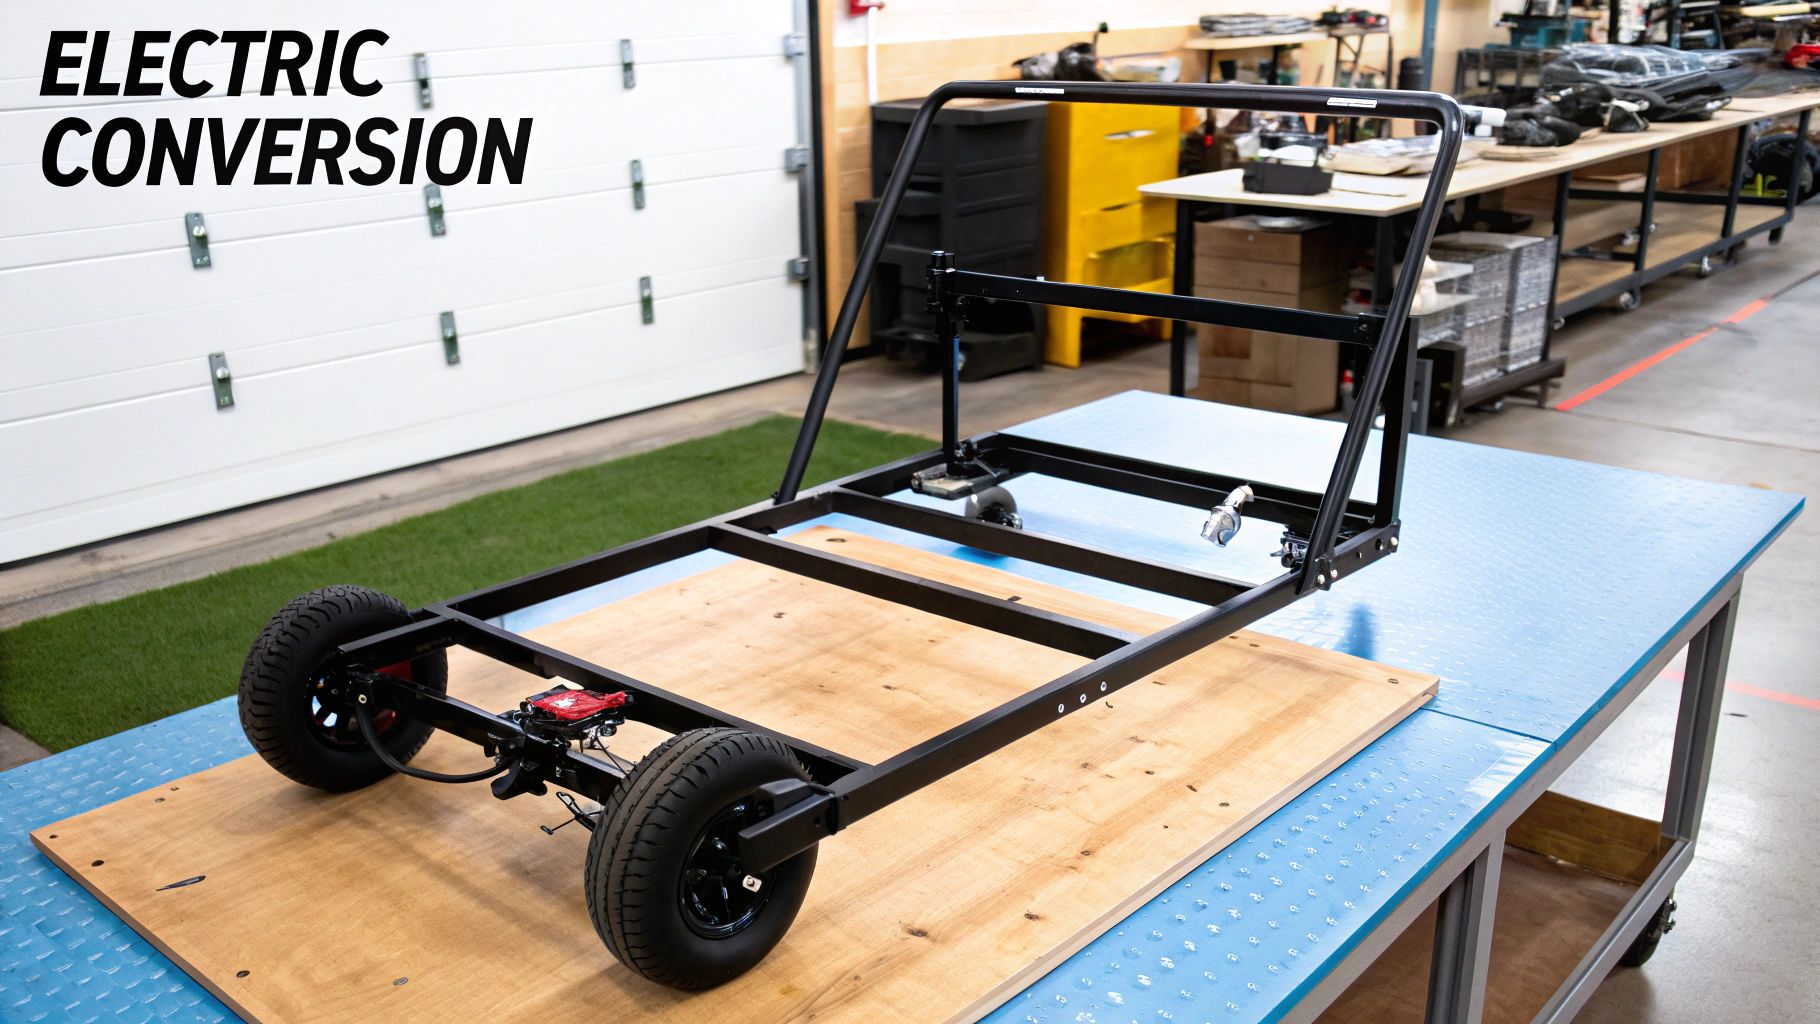
Manual Push Cart vs. Electric Conversion
Still on the fence? Here’s a quick look at how upgrading your cart can change your experience on the course.
| Feature | Standard Push Cart | Converted Electric Cart |
|---|---|---|
| Physical Effort | High, especially on hilly or long courses. | Minimal. The motor handles the load, saving your energy. |
| Cost | Lower initial purchase price. | Higher initial investment, but far cheaper than a new electric cart. |
| Course Experience | Can lead to fatigue and loss of focus late in the round. | Preserves stamina, improves focus, and makes walking enjoyable. |
| Convenience | You do all the work. | Effortless mobility, especially on inclines. |
As you can see, the conversion is less about luxury and more about smart, practical performance enhancement.
The Smart Financial Decision
One of the biggest reasons golfers opt for a golf push cart electric conversion kit is the massive cost savings. A brand-new, top-of-the-line electric trolley can easily set you back over a thousand dollars, which is a steep price for many of us. A conversion kit, on the other hand, delivers a very similar experience for a much smaller investment.
By retrofitting the push cart you already own and love, you get all the advantages of motorized assistance without the premium price tag. It's a practical way to modernize your gear and give it a whole new lease on life.
This isn’t just a niche trend; it’s part of a bigger movement in the golf world. The market for electric golf carts was valued at around USD 1.7 billion in 2024 and is expected to keep growing. This signals a broad shift toward electric mobility on the links, and conversion kits are a huge part of making that technology accessible to more players.
Beyond Convenience: A Strategic Advantage
Upgrading your cart is more than just a nice-to-have feature—it's a strategic play to boost your performance. When you’re not wasting physical energy, you can maintain better mental focus from the first tee to the last green. That means sharper decision-making on tricky shots and a steadier hand when you’re lining up a putt. You can check out more of the top reasons to invest in a push cart conversion kit in our detailed guide.
Ultimately, this one upgrade elevates your entire day on the course. It allows you to:
- Finish rounds strong: Say goodbye to late-round fatigue that often leads to sloppy mistakes.
- Play more golf: With less physical strain, playing more often or even walking 36 holes becomes much more manageable.
- Enjoy the walk: You can actually appreciate the course and the company you're with, without constantly thinking about the next hill.
Choosing the Right Conversion Kit for Your Cart
Picking the perfect golf push cart electric conversion kit feels a lot like choosing the right club for a tricky shot—it takes a bit of thought. Before you even start looking at motors or batteries, the absolute first thing you need to do is check for compatibility. A top-of-the-line kit is completely useless if it doesn't fit your cart.
Most manufacturers have compatibility charts, but don't just take their word for it. It's always best to double-check your own gear. Grab a tape measure and get the diameter and shape of your cart's main frame tubing, since that's usually where the controls or battery mount will attach. Also, take a close look at the rear axle, because that’s the critical part for axle-driven motors. Taking five minutes to measure now can save you a massive headache later.
Evaluating Motor and Drivetrain Options
With compatibility confirmed, your next big decision is the motor. You'll generally find two main types of conversion kits: those with axle-driven motors and those with hub motors. Each one has its own strengths, and the right choice really depends on the courses you play.
- Axle-Driven Motors: These kits usually replace your cart’s entire rear axle with a motorized one. They deliver excellent torque and stability, making them a fantastic choice for golfers who regularly tackle hilly or challenging terrain. The direct power transfer to both wheels gives you balanced traction and stops the cart from slipping on wet grass or steep climbs.
- Hub Motors: With these, the motor is built right into one or both of the rear wheels. The design is often sleeker and the installation can be a bit more straightforward. While they pack plenty of punch, they might not have the same raw climbing power as a beefy axle-driven system, which makes them a better fit for flatter, parkland-style courses.
So, if your home course is known for its dramatic hills, an axle-driven kit is probably the smart money. But if you're mostly playing on flat ground, a hub motor system will do the job just fine and might even be a little lighter.
Understanding Battery Technology and Range
The battery is the heart and soul of your electric conversion kit, and the technology inside it really matters. Your choice will almost always come down to a Lead-Acid battery versus a Lithium-Ion (Li-ion) one.
The right battery is a trade-off between weight, lifespan, and cost. While a Lithium-Ion battery has a higher upfront cost, its lighter weight and significantly longer lifespan—often rated for 1000+ charge cycles—make it a superior long-term investment for serious golfers.
A Lead-Acid battery is the more budget-friendly option, and it'll certainly get the job done. The downside? It's much heavier and has a shorter overall life, usually lasting just a few hundred charges. If you’re playing multiple times a week, that extra weight and the need to replace it more often can become a real pain.
Think about how much golf you actually play. A quality Li-ion battery, like the one found in the Caddie Wheel, can easily last for up to 36 holes on a single charge. That means you can play back-to-back rounds without worrying about running out of juice. This shift toward more efficient power is happening everywhere, not just in golf. In fact, the global market for electric vehicle conversion kits is expected to hit roughly USD 31.86 billion by 2034, which shows a massive consumer move toward electric power in all kinds of vehicles. You can dive deeper into these trends in this detailed market research report.
Key Features and Control Systems
Finally, think about the little extras that make your time on the course more enjoyable. Modern conversion kits offer a lot more than just a simple forward button.
Look for kits that come with a remote control, which lets you manage speed, direction, and braking from a distance. Some even have preset distance functions, so you can send your cart ahead to the next tee while you walk to the green. Variable speed settings are also a must-have, allowing you to match the cart’s pace perfectly to your walking stride. Another feature to look out for is an automatic braking system, which is a lifesaver for preventing your cart from getting away from you on a downhill slope.
A Practical Guide to Installing Your Kit
Now for the fun part: getting your hands dirty and installing your new golf push cart electric conversion kit. Don't worry, these kits are designed for a simple DIY setup, and most golfers find the process pretty straightforward. With just a little preparation and the right tools, you'll have your cart motorized and ready for the links in no time.
First things first, get your workspace ready. A clean, flat spot like a garage floor or driveway is perfect, giving you plenty of room to move around the cart. It's also a good idea to give your push cart a quick wipe-down, paying special attention to the axle and frame where you'll be mounting the new parts. Clearing away any grass or dirt ensures a clean, secure fit.
Next, you'll want to round up your tools. The good news is you won't need a professional mechanic's toolbox. Most kits are designed for simple assembly, but having these basics handy will make the whole process much smoother.
Essential Tools for Installation
Before you even open the box, take a minute to gather everything you need. This little bit of prep work prevents you from having to stop mid-project to hunt for a wrench.
Here’s a quick checklist of what you'll likely need for a smooth installation.
| Tool/Item | Purpose | Pro Tip |
|---|---|---|
| Wrench Set | For tightening the nuts and bolts that secure the motor and brackets. | An adjustable wrench will work, but a socket set makes the job go much faster. |
| Screwdrivers | Usually for mounting the controller unit or battery housing. | It's smart to have both Phillips head and flathead drivers on hand. |
| Zip Ties | To neatly secure all the wiring along the cart's frame. | Use black, UV-resistant zip ties. They look professional and last longer. |
| Wire Cutters | To trim the excess ends off the zip ties for a clean finish. | A sharp pair of scissors can also do the trick if you're in a pinch. |
| Shop Towels | For cleaning the cart frame and wiping away any grease or grime. | Microfiber cloths are great for preventing any scratches on your cart's finish. |
Having these items ready to go will turn what could be a frustrating task into a satisfying project.
Mounting the Motor Assembly
The heart of the installation is getting the motor mounted correctly. For an axle-driven kit, this usually means swapping out your cart's existing rear wheels and axle for the new motorized unit. The absolute key here is getting the alignment perfect.
Start by loosely attaching the mounting brackets—don't tighten the bolts all the way yet. This leaves you some wiggle room to make sure the axle is perfectly centered and parallel to the cart's frame. Once you're happy with the positioning, tighten the bolts a little at a time, alternating between them to apply even pressure. If you overtighten one side first, you can easily pull it out of alignment, so take your time.
This visual guide breaks down the core installation flow into three simple phases.
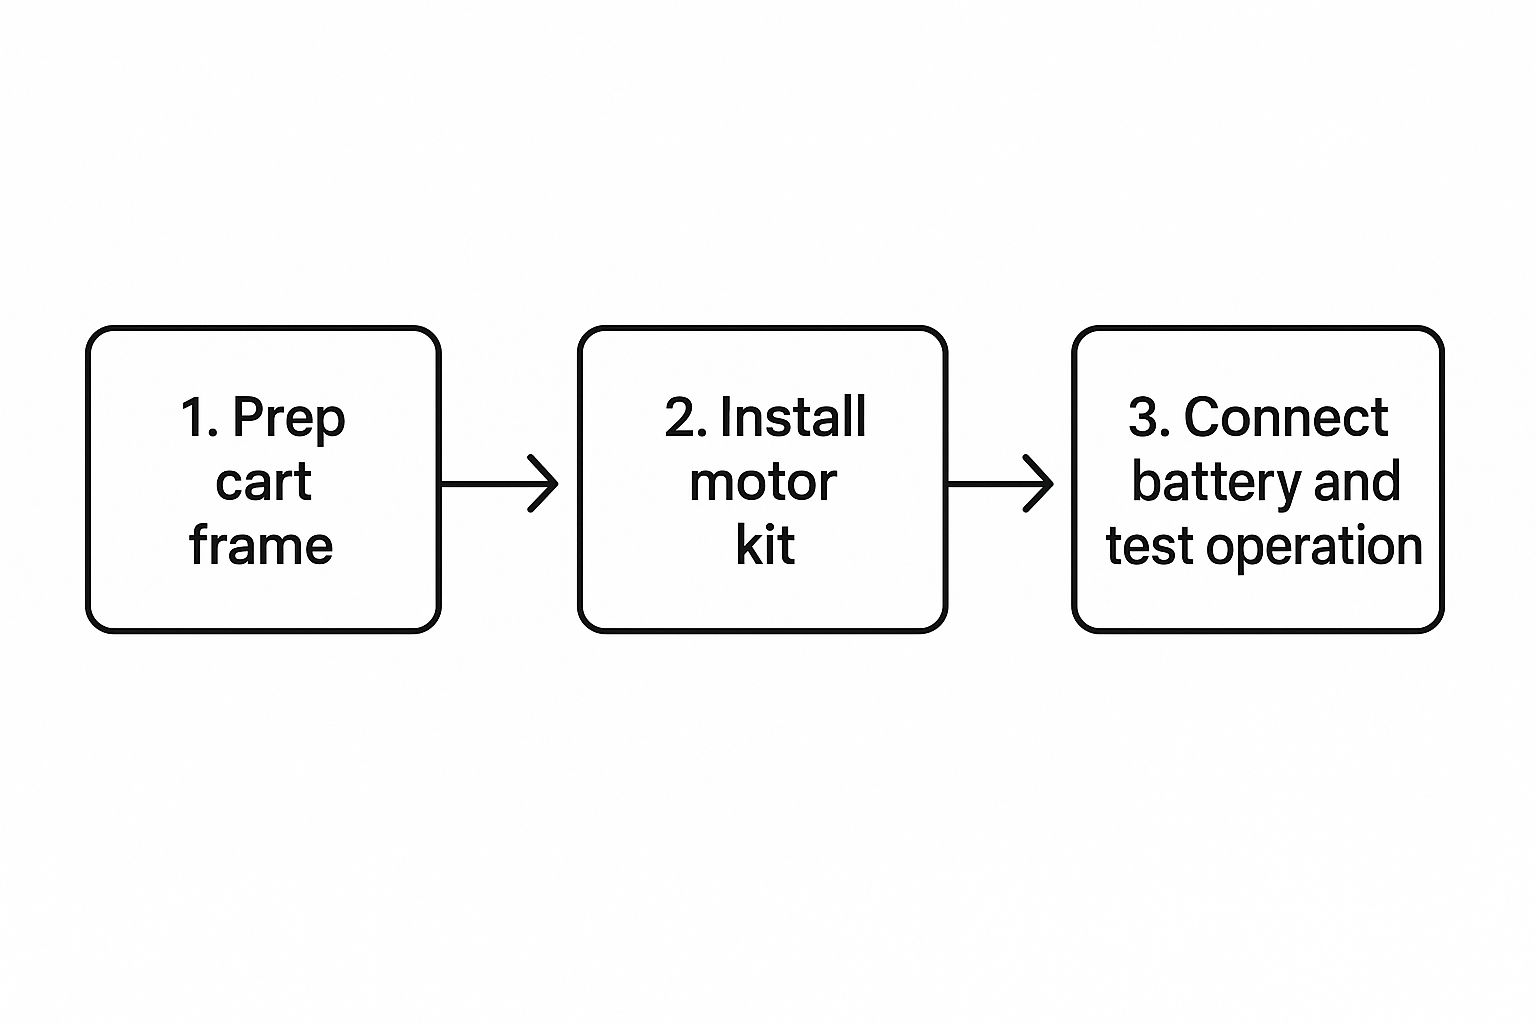
As you can see, it’s a logical flow from preparation right through to the final power-on test.
Connecting the Electronics and Managing Cables
With the motor securely in place, it’s time to hook up the electronics. This part involves mounting the controller to the handle and securing the battery pack, usually on the lower frame. The connectors are almost always color-coded or uniquely shaped, which makes it nearly impossible to mix them up.
Here’s a pro tip that can save you a massive headache: do a "bench test" before you tidy up the wiring. Connect the motor, controller, and battery while everything is still easy to get to. Power it on and give the controls a quick test—forward, reverse, and speed adjustments. Confirming everything works now saves you from having to undo all your hard work later if there's a loose connection.
Once you know the system works, it's all about cable management. Route the wires neatly along your cart's frame, using zip ties every six to eight inches to hold them in place. This not only looks a hundred times better but also keeps a stray wire from getting snagged on a branch or your golf bag.
A clean wiring job is what separates an amateur setup from a professional-looking one. For a more detailed walkthrough, check out this easy DIY guide on how to convert a push cart to electric that covers even more tips. Follow these steps, and you'll have a reliable and cleanly installed kit ready for its first round.
Getting the Most Out of Your Motorized Cart
Alright, your newly converted cart is ready for its maiden voyage. Now the real fun begins—mastering it on the course. Think of this like learning the feel of a new driver. It takes a few swings to get comfortable, but once you do, it becomes a natural extension of your game.
The first skill to practice is getting a smooth start. Instead of jamming the speed dial to max, gently feather the controls to get the cart rolling. This is key to preventing jerky movements and making sure your bag stays put. For example, when you're leaving a tee box, start on the lowest setting and slowly dial it up until it matches your walking pace. It's a small adjustment that makes a huge difference in control and battery life.
Navigating Tricky Terrain and Using Advanced Features
Your motorized cart really starts to shine when you hit some challenging landscapes. When you see a steep hill coming up, don't be afraid to give it a little extra power before you start the climb. This keeps your momentum up and puts less strain on the motor. On the flip side, when you're navigating tight spots around bunkers or greens, slowing down is your best friend.
Many modern kits, like the Caddie Wheel, come with intuitive remote controls. These are more than just a cool gadget; they’re strategic tools.
- Distance Presets: Some remotes let you send the cart ahead a set distance, like 30 or 60 feet. After you crush a drive, you can send your cart toward your ball while you enjoy the walk, bag-free.
- Precise Steering: Use the remote to guide your cart along the path while you walk on the fairway. This is perfect for keeping it out of wet or soft ground.
Mastering these features transforms your cart from a simple carrier into a personal caddy. After you've putted out, you can send your cart ahead to the next tee while you mark your scorecard. It saves time and keeps the pace of play moving right along.
Smart Battery Management for a Full Round
The number one rule of managing your electric cart is simple: always start with a full charge. But how you use the cart during your round is what really determines whether you finish 18, 27, or even 36 holes.
Think of your battery like a fuel tank. Driving aggressively burns through fuel faster, and the same idea applies here. Constantly gunning the motor at its highest speed, especially on hilly courses, will drain that battery in no time. In fact, a study of electric cart usage found that reducing the average speed by just 1 mph can extend battery life by up to 15% over an 18-hole round.
To make sure you always have enough juice to get back to the clubhouse, try to build these habits:
- Use Momentum: Let the cart coast on slight downhills instead of keeping the power on.
- Moderate Speed: Find a comfortable walking pace and stick to it rather than using a "stop-and-go" approach at high speed.
- Lighter Load: While not always possible, avoid loading your bag with unnecessary stuff that just adds weight and strains the motor.
By adopting these simple practices, you'll get the best performance out of your cart and ensure it's always ready for the next hole. Learning more about how electric push cart conversion kits offer a green alternative can also give you more insight into their efficient operation.
Simple Maintenance to Keep Your Cart Rolling
Just like your favorite driver or putter, your golf push cart electric conversion kit needs a little TLC to perform its best. A few simple habits are all it takes to keep it running smoothly round after round. Think of it as a quick pre-game warmup—a routine that prevents surprise issues on the course and protects your investment for years to come.
You’ll save yourself a lot of headaches (and potential repair bills) by getting these small things right.
The Heart of the System: Battery Care
The battery is the most important component, and its lifespan depends almost entirely on how you treat it. Proper charging isn't just a suggestion; it's a must.
Always use the charger that came with your kit. It’s designed specifically for your battery's chemistry. It’s also a good habit to avoid leaving it plugged in for days on end after it’s full. For most modern lithium-ion batteries, you’ll want to top it up after every use, even if you only played nine holes. This keeps the cells healthy and ready for your next outing.
This kind of care is becoming more important as golf embraces electrification. The global golf cart market was valued at around USD 1.5 billion in 2024, and that number is only going up as more courses and players look for greener ways to play. Conversion kits are a huge part of that shift. If you're interested in the bigger picture, you can learn more from this in-depth industry report.
A Quick Pre-Round Inspection
Beyond the battery, a few physical checks can make all the difference. After a round, especially on a wet or muddy day, take a minute to wipe down the motor housing and axle. It's surprising how quickly grass, dirt, and grime can build up, putting extra strain on the motor and risking an overheat.
Your best defense against problems is a quick visual scan before you head out. Make this part of your routine:
- Wiring: Quickly trace the cables connecting the battery, controller, and motor. Are there any frayed spots, pinches, or signs of wear?
- Mounts and Hardware: Give the motor assembly and battery mount a gentle tug. Everything should feel snug and secure. A loose bolt is an easy fix in the garage, not so much on the course.
- Wheels and Axle: Make sure the wheels spin freely without any grinding. A quick peek at the axle will tell you if any grass or string has gotten tangled up in there.
Spending 30 seconds on these checks before you load up the car is one of the smartest things you can do. A loose connection or a frayed wire is much easier to deal with at home than on the 7th fairway.
Off-Season Storage Done Right
When it's time to hang up the clubs for the winter, how you store your battery is critical. Never put a lithium-ion battery away for months when it's completely dead or fully charged. Both extremes can degrade the cells over time.
The sweet spot for long-term storage is between 50% and 70% charge.
Store the battery inside in a cool, dry place—think a closet or a shelf in the garage, not a freezing shed or a hot attic. Once a month, it’s a good idea to check the charge level and top it back up to that 50-70% range if it has dropped. This simple step ensures that when spring finally rolls around, your battery is healthy and ready for a full 36 holes.
Common Questions About Cart Conversion Kits
Even after we've covered the benefits, selection process, and installation, a few questions always seem to pop up. If you're wondering about some of the finer details of using a golf push cart electric conversion kit, you're definitely not alone. Let's clear up some of the most common questions to make sure you feel totally confident about your upgrade.
One of the first things golfers ask is about battery life. Can it really last a full round, or maybe even two? Absolutely. With a quality lithium-ion battery, like the one powering the Caddie Wheel, you can easily get up to 36 holes on a single charge.
Of course, this can vary a bit depending on the course—a hilly track is going to chew up more juice than a flat one—but for most players, it means "range anxiety" is a thing of the past, even on a two-round day.
Kit Compatibility and Weather Resistance
Another big concern is whether these kits are a one-size-fits-all deal. While many are designed to be pretty universal, they don't fit every single cart out there.
For instance, the Caddie Wheel was engineered to work with a huge range of popular three- and four-wheel push carts. That said, you should always double-check the manufacturer’s specs to confirm it's a perfect match for your specific model before you buy.
And what about playing when the weather isn't perfect? A little rain shouldn't stop a round of golf, and it shouldn't stop your cart, either. Most high-quality conversion kits are built with weather-resistant components, so they can handle damp conditions and a light shower without any problems.
But "weather-resistant" isn't the same as "waterproof." A bit of common sense goes a long way here. You'll want to avoid:
- Submerging the motor or battery completely in a deep puddle.
- Leaving the unit out in a heavy downpour for a long time.
- Blasting the electronic parts with a high-pressure hose when cleaning.
A quick wipe-down with a damp cloth after a wet round is really all it takes to keep your kit in top shape. Just treat it like any other piece of electronic gear, and you'll be fine.
Finally, golfers often ask if the kit adds a ton of weight. It's a fair question—nobody wants to trade the effort of pushing for the effort of lifting. Modern kits with lithium-ion batteries are surprisingly light, usually adding only about 10-15 pounds to your setup. It's a small price to pay for the huge convenience you get on the course, and it's still easy enough to lift in and out of your car.
Ready to stop pushing and start playing? The Caddie Wheel makes upgrading your push cart simple and affordable. Learn more and get yours today!
Share:
Boost Your Golf Cart Power: Expert Tips & Insights
Battery Powered Golf Carts Explained