That grinding noise from the rear, a sudden lack of oomph on hills, or a cart that stubbornly refuses to move—these are the classic cries for help that might signal a golf cart motor replacement is in your future. But before you rush to order a new motor, it’s crucial to play detective. Is the motor truly the villain, or is a simpler fix, like a weak battery, the real problem?
Is It Time for a New Golf Cart Motor?
Deciding to swap out your golf cart's motor isn't a small task. It's a significant job, and getting the diagnosis wrong can be a frustrating and expensive mistake. Your first step should always be to look for clear symptoms that point directly to a failing motor, not something else.
Common Signs of a Failing Motor
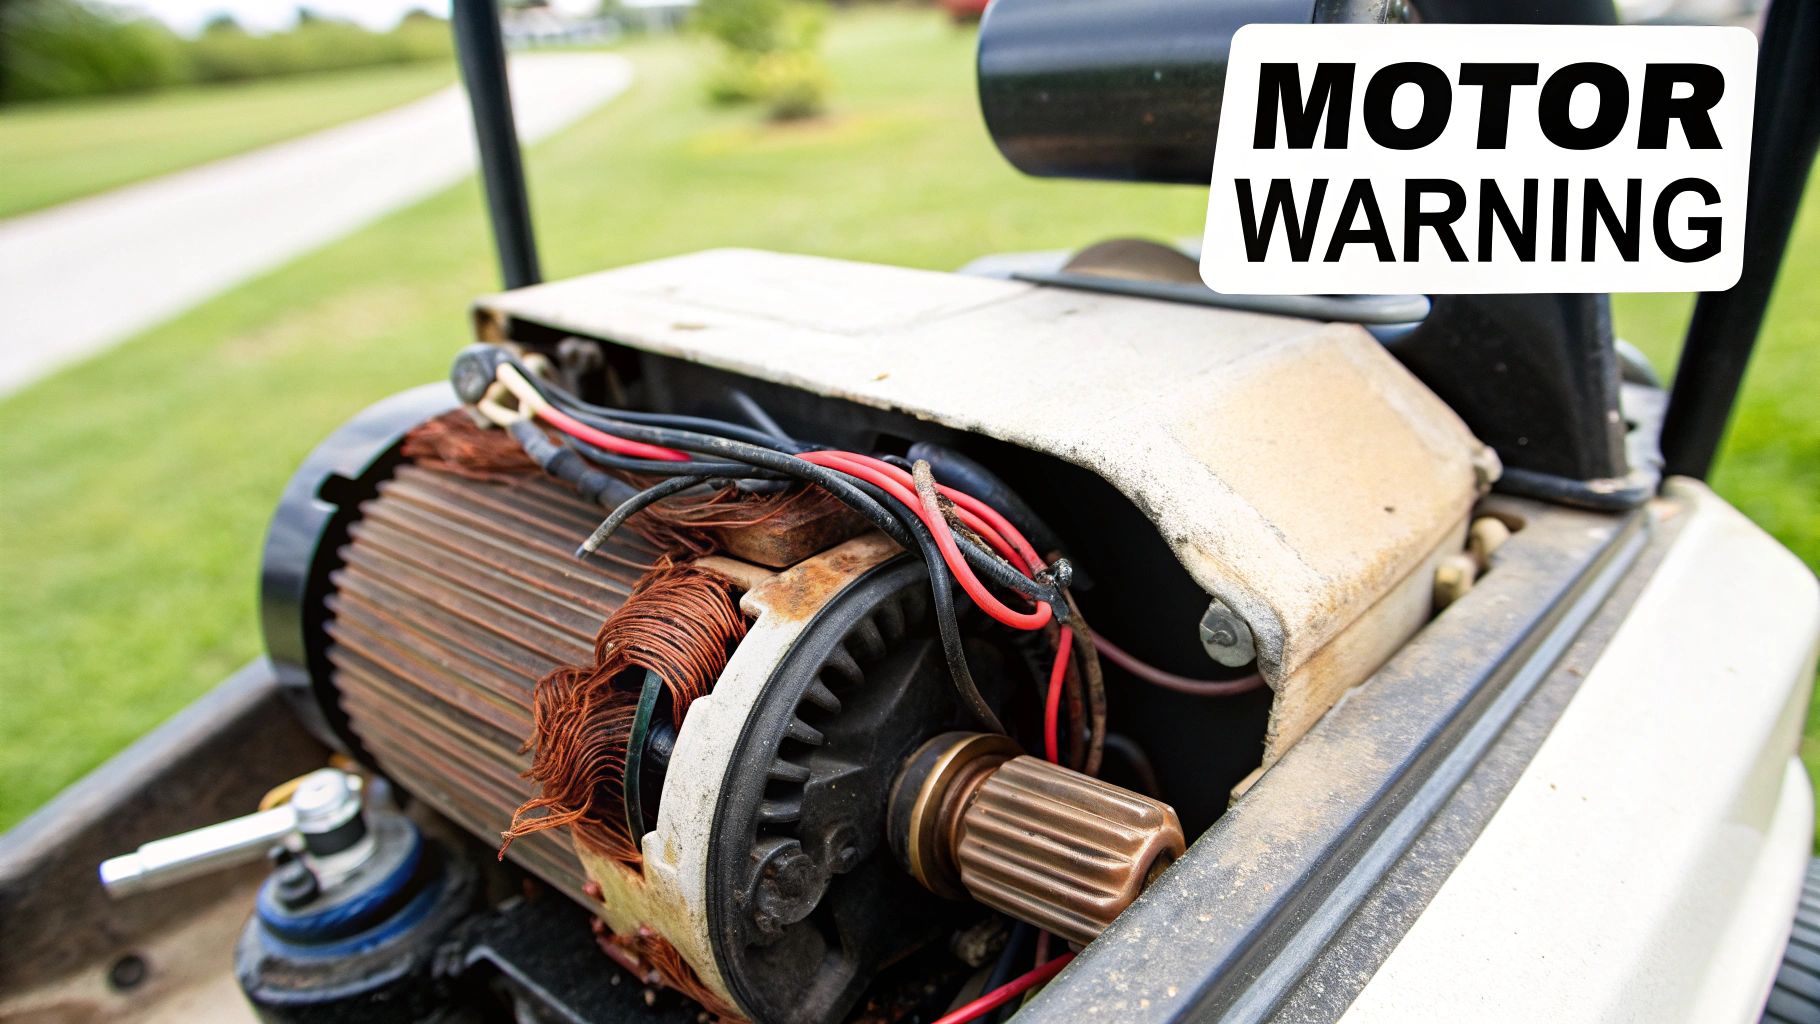
A worn-out motor usually doesn't die in silence. One of the most common complaints I hear is a major drop in torque. You'll feel it when your cart starts struggling on hills it used to conquer without a problem. You might also notice a distinct burning smell—like hot electronics or wires—wafting from the motor area after a ride.
Noise is another big giveaway. A healthy motor runs almost silently, but a failing one will often protest with grinding, whining, or clunking sounds. These noises typically get louder and more intense under load, like when you accelerate hard or head up an incline.
Pro Tip: Don't jump to the worst-case scenario. A cart that won't move at all can often be traced back to a drained battery pack or a fried solenoid. Always check the simple, common culprits first before committing to a full motor replacement.
Distinguishing Motor Issues from Other Problems
It’s surprisingly easy to mistake other common golf cart issues for a bad motor. To avoid a costly misdiagnosis, you have to rule out other potential causes. For example, a set of old, weak batteries will absolutely cause sluggish performance and shorter range, symptoms that perfectly mimic a tired motor.
Historically, the older brushed DC motors were often paired with lead-acid batteries and had a finite lifespan, sometimes needing replacement after 5,000 to 7,000 hours of operation. While modern tech has improved longevity, the core principle is the same: the power source is just as important as the motor. If you're curious about how the technology has evolved, you can explore some of the golf cart industry analysis from GrandViewResearch.com.
To help you sort things out, here’s a quick reference table.
Diagnosing Your Golf Cart's Problem
Use this quick reference to help distinguish between motor issues and other common golf cart problems.
| Symptom | Potential Motor Issue | Potential Other Issue |
|---|---|---|
| No movement, but solenoid clicks | A completely seized or burnt-out motor. | A faulty controller or a bad connection. |
| Sluggish on flat ground and hills | Worn brushes or internal motor wear. | A weak battery pack or bad battery cables. |
| Runs fine, then abruptly stops | Motor overheating from internal failure. | A faulty speed sensor or controller issue. |
| Grinding or whining noise | Worn bearings or damaged motor splines. | A problem in the differential or rear axle. |
Running through these symptoms can give you a much clearer picture of what's happening under the seat. Once you’ve ruled out the simpler fixes, you can move forward with confidence.
Choosing the Right Motor for Your Cart
Alright, let's talk about the heart of your project: the motor. Picking the right one is easily the most important decision you'll make. This choice single-handedly determines your cart's future personality—how it tackles hills, how fast it gets up to speed, and how it feels to drive every day. It’s not just about getting a part that fits; it’s about matching the motor's capabilities to what you actually do with your cart.
Motor Types: Series vs. Sepex vs. AC
Your first big decision boils down to the type of DC motor you want. The two most common options you’ll come across are series and sepex motors. Think of a series motor as the workhorse of the golf cart world. It’s designed to produce incredible low-end torque, which is exactly what you need for climbing steep hills or hauling heavy loads without bogging down. It’s the diesel truck of electric motors—all about raw pulling power.
On the flip side, a sepex (separately excited) motor is built for speed. These motors deliver higher RPMs, which means a faster top speed on flat ground. If you're mainly cruising around a level neighborhood or just want a zippier ride, a sepex motor is probably your best bet.
More recently, AC motors have become a popular high-end option. They offer the best of both worlds: fantastic torque for climbing and high-speed capabilities, all while being more efficient.
Motor Type Performance Comparison
To make things a little clearer, here’s a quick breakdown of how these motor types stack up. Think about your typical use case—are you a hill-climber or a speed demon?—to find the best fit.
| Motor Type | Best For | Key Advantage | Controller Consideration |
|---|---|---|---|
| Series | Hilly terrain, heavy loads, utility use | High low-end torque | Generally paired with simpler, robust controllers |
| Sepex | Flat ground, neighborhood cruising, speed | Higher RPMs for top speed | Requires a specific sepex controller; allows for regenerative braking |
| AC | All-around performance, efficiency | High torque and high speed, better efficiency | Requires a matching AC controller and is often sold as a kit |
Ultimately, the right choice depends on your priorities. An AC system is a phenomenal upgrade, but for many cart owners, a well-chosen Series or Sepex motor provides the perfect performance boost without the higher cost.
Match the Motor to Your Cart and Your Habits
So, how do you decide? Let your driving habits be your guide. If you’re a golfer who constantly deals with a hilly course, a series motor will eliminate that frustrating crawl up every incline. If you use your cart to zip around town on paved streets, a sepex motor will give you that satisfying speed you're looking for.
It's also crucial to match the motor to your cart’s make and model, whether it’s a Club Car, EZGO, or Yamaha. While many aftermarket motors are built to fit multiple brands, they often have specific mounting patterns or spline counts that match certain differentials. Always, always double-check that a motor is compatible with your cart’s specific model and year. Trust me, this will save you a world of headaches during installation.
Don't Forget the Controller
This brings us to what is easily the most overlooked part of a motor swap: the controller. If you're just replacing a worn-out stock motor with an identical one, your existing controller will be fine. But if you’re upgrading for more power, a new controller isn't just a good idea—it's usually mandatory.
Your cart's controller is the brain, and the motor is the muscle. If you give the muscle a major upgrade without telling the brain, you won't get the results you want. An undersized controller will bottleneck a powerful new motor, limiting its performance and potentially causing it to overheat.
High-performance motors are hungry for power and draw more amperage than a stock controller can safely deliver. Skimping on the controller is like putting a V8 engine in a car but keeping the tiny fuel line from a four-cylinder. You'll starve the motor of the power it needs to perform.
As electric carts have become popular for far more than just golf, the market for performance parts has exploded. This is part of a much larger trend, with the global golf cart market projected to hit USD 3.68 billion by 2032. You can read more about this industry growth in this research on MaximiseMarketResearch.com. For you, this means there’s a huge selection of motor and controller combinations out there to help you achieve any performance goal you have in mind.
Gathering Your Tools and Prioritizing Safety
A successful golf cart motor replacement is as much about good preparation as it is about turning wrenches. Trust me, diving in without the right gear is just asking for a long, frustrating afternoon and can even be dangerous. Before you even think about loosening a single bolt, take a few minutes to get your tools in order and set up a safe workspace. It’s a non-negotiable first step.
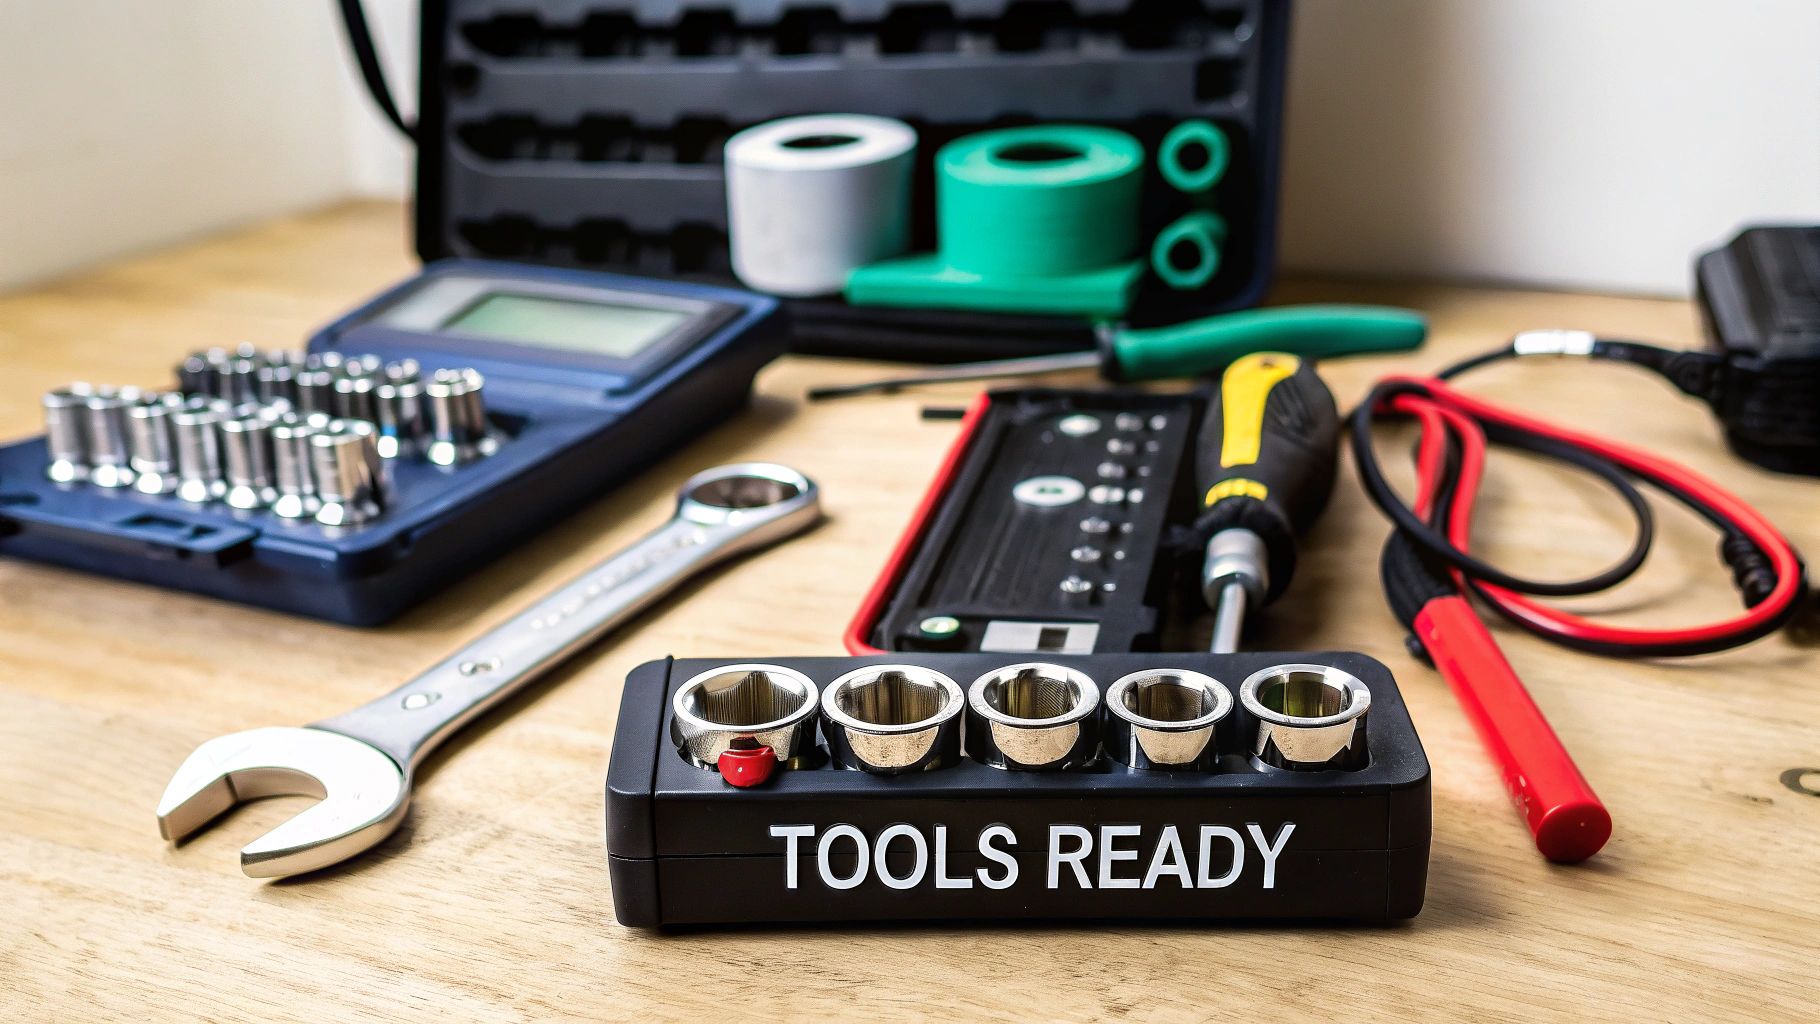
Think of it like this: you wouldn't start a complex recipe without laying out all your ingredients first. You don't need a professional mechanic's garage for this job, but a few basics are absolutely essential. At a minimum, you'll want a quality socket and wrench set (it’s smart to have both metric and standard sizes), a solid floor jack, and a pair of sturdy jack stands.
Crucial Safety Precaution: Never, ever work underneath a golf cart that's only held up by a floor jack. Jacks are designed for lifting, not holding, and they can fail without any warning. Always secure the cart with properly rated jack stands on a flat, solid surface like a concrete garage floor.
Your Essential Tool and Safety Checklist
While the basics will get you started, a few extra items can make this job go from a chore to a smooth project. Having these ready will save you from those annoying mid-job runs to the hardware store.
- Socket Set: A good set with a few different extensions will be your best friend.
- Wrenches: A complete set of combination wrenches.
- Floor Jack: To lift the rear of the cart.
- Jack Stands: At least two. This is for your safety—don't skip them.
- Painter's Tape and a Sharpie: This is my secret weapon for labeling cables. It’s a lifesaver.
- Penetrating Oil: You’ll be glad you have this when you hit a stubborn, rusted-on bolt.
- Safety Glasses and Gloves: Protect your eyes and hands. It's a simple step that matters.
- Wire Brush: Great for cleaning up terminals and motor mounts before reassembly.
Here’s a pro tip from someone who’s learned the hard way: label everything. Before disconnecting any wire, wrap a small piece of painter's tape on it and write down its connection point (e.g., "A1," "F1"). Then, snap a quick, clear photo with your phone as a backup. This two-minute task can honestly save you hours of head-scratching later.
The Non-Negotiable Safety Steps
Working with a golf cart's electrical system isn't something to take lightly. These systems pack a serious punch, so respect is key. The absolute first thing you must do is completely shut down the power. Find your cart's Tow/Maintenance switch and flip it into the "Tow" position. This essential step deactivates the controller and prevents the cart from lurching forward unexpectedly.
Next, you have to disconnect the battery pack. Start by removing the main negative cable from the battery pack's main negative terminal. Be sure to tuck the cable end safely away where it can't accidentally touch another terminal. This single action breaks the entire circuit, making the system safe to work on. For a more detailed look at this, our guide to golf cart battery maintenance has some great, easy-to-follow instructions.
With the power off and the cart resting securely on jack stands, you're finally ready to get started.
How to Remove the Old Motor
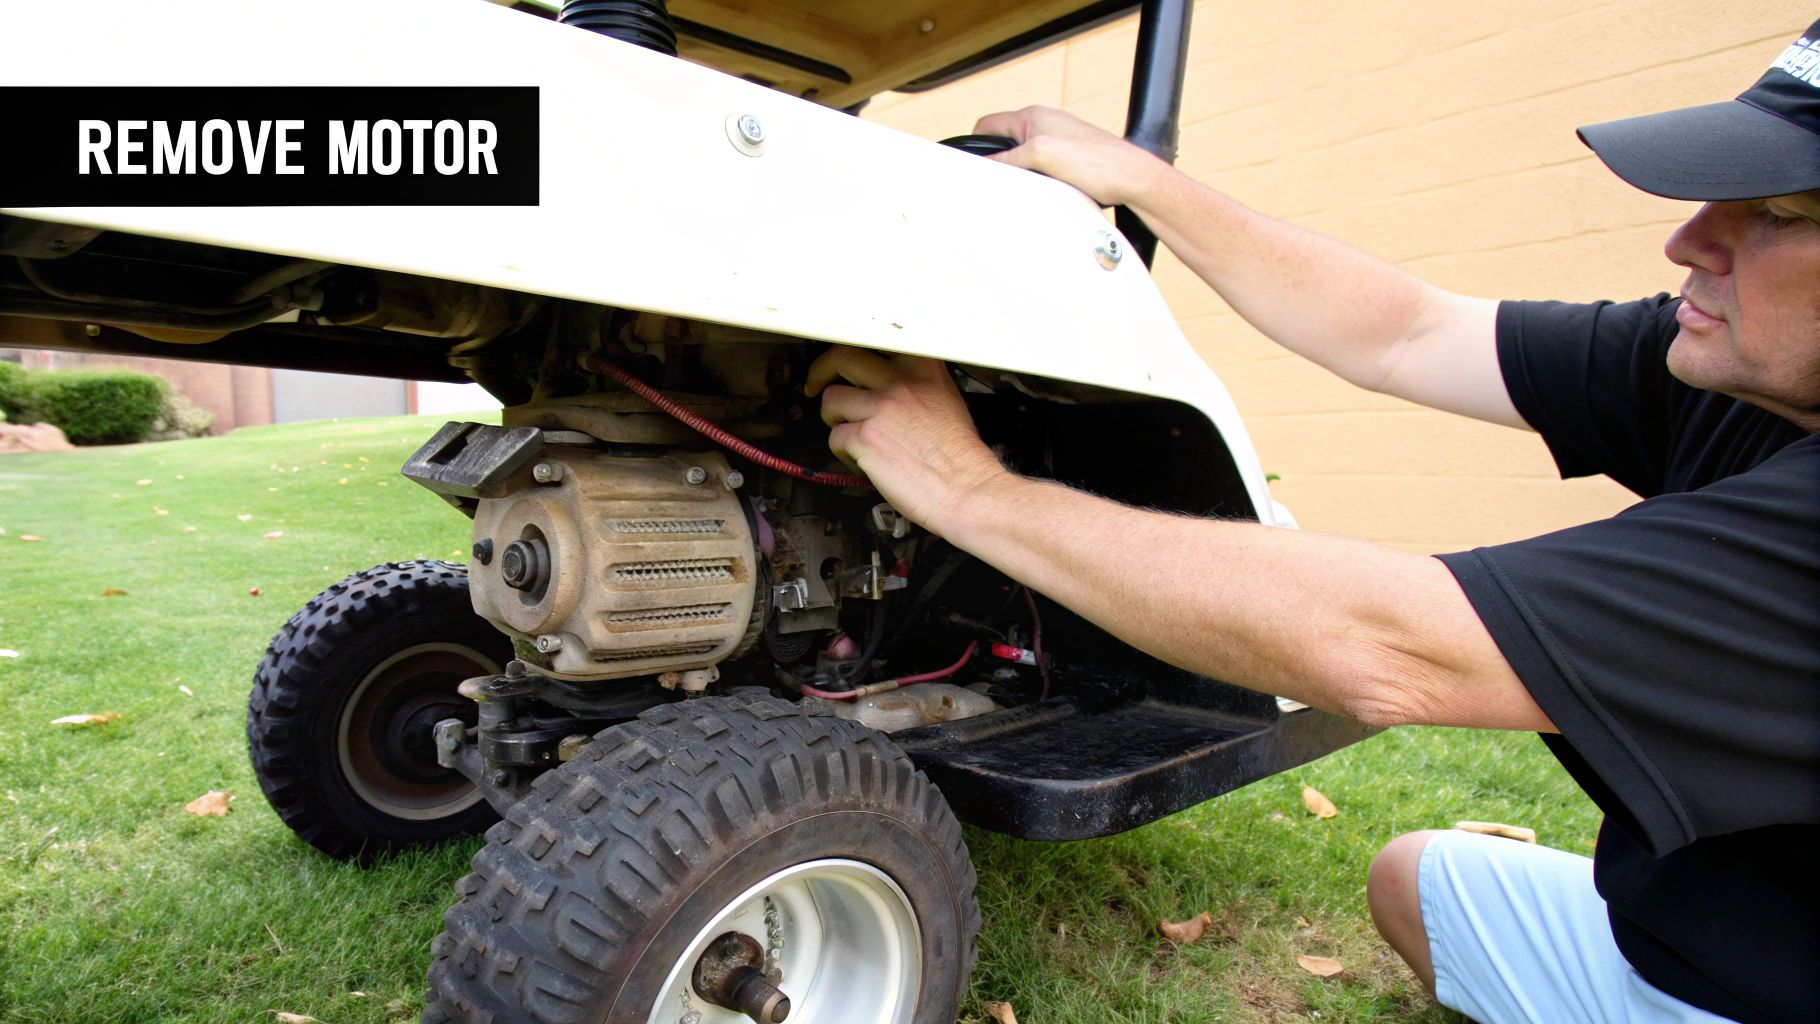
Alright, this is where the real work begins. With your cart safely parked and the power completely cut, it's time to get your hands dirty and pull out the old motor. The process itself is pretty straightforward, but your success really comes down to being patient and methodical—especially when dealing with parts that don't want to budge.
First things first, you need a clear shot at the motor, which is almost always mounted right onto the rear differential. Depending on your cart's make and model, this might mean taking off a rear access panel or maybe the whole bag well liner. Once you can see it clearly, you'll spot the thick, heavy-gauge electrical cables running to the motor's terminals.
This is where that labeling system you set up earlier becomes a lifesaver. Even if you took a few photos, having those little pieces of tape on each cable—A1, A2, S1, S2, and so on—takes all the guesswork out of the equation. Grab your wrench set, carefully loosen the nuts on each terminal, and pull the cables off. Just make sure to tuck them somewhere safe where they won't get snagged or damaged.
Unbolting the Motor from the Differential
With the electrical cables out of the way, the only thing holding the motor in place is a few mounting bolts connecting its housing to the differential. These bolts can be notoriously tight, and if you're unlucky, they might be rusted solid. Don't be shy with the penetrating oil here; give them a good spray and let it soak in for 10-15 minutes to work its magic.
Using the right-sized socket, carefully loosen and remove each bolt. I'd recommend leaving one or two bolts partially threaded in until you're physically ready to lift the motor out. These things are heavier and more awkward than they look, weighing anywhere from 30 to 50 pounds, and the last thing you want is for it to drop unexpectedly.
Insider Tip: Sometimes, even with all the bolts out, the motor seems "stuck" to the differential thanks to a bit of corrosion. Fight the urge to grab a screwdriver and pry it off—you'll likely damage the soft aluminum housing. Instead, try a few gentle taps on the side of the motor with a rubber mallet. That's usually enough to break the seal.
Once the last bolt is out, brace yourself and carefully slide the motor straight back, pulling it away from the differential. It has a splined shaft that fits directly into the differential, so it has to come out horizontally. A little wiggling can help disengage the splines. With the motor free, lift it out of the cart and set it somewhere out of your way.
The image below gives you a good visual of the core steps you'll be following when you install the new motor, which is pretty much this whole process in reverse.
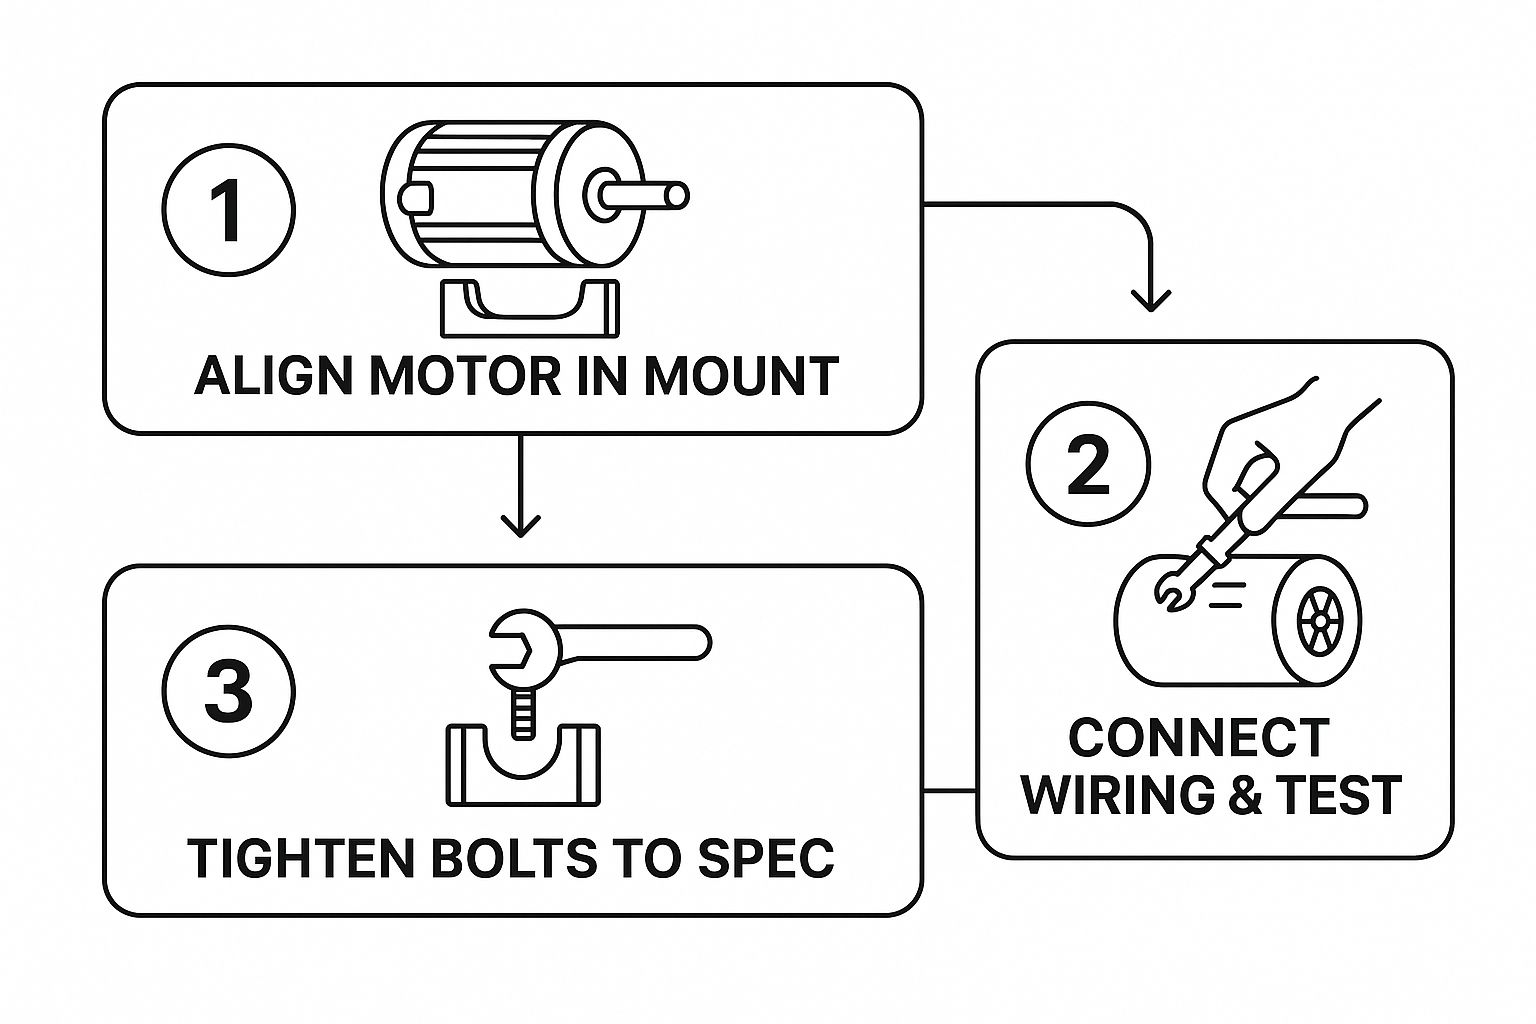
This flow really highlights how important precision is, from the alignment and bolt torque to the final checks you'll do. These are principles that matter just as much for removal as they do for installation.
Final Prep Work Before Installation
Before you get all excited and start dropping the new motor in, take a minute to prep the area. Grab a wire brush and clean up any corrosion or gunk from the differential's mounting surface where the motor sits. A clean connection point is absolutely critical for proper alignment and even for helping dissipate heat.
While you're at it, take a good look at the splines on the old motor's shaft. If they look badly worn down or stripped, it could be a sign of a bigger issue with the differential's input shaft—a much more complicated repair. If you run into something complex like that, you might want to consult a broader DIY guide to electric golf cart repair to get a better handle on the related parts.
By carefully working through these removal steps, you've officially done the hard part. Your cart is now prepped and ready for its new powerhouse.
Installing Your New Golf Cart Motor
With the old motor out of the way, you’re on to the best part of the job: putting in your powerful new upgrade. Think of this as the reverse of what you just did, but now your focus needs to shift from brute force to careful finesse. Precision is everything, especially when it comes to getting the alignment just right.
Before you even think about lifting the new motor, grab a wire brush. Give the terminals on your electrical cables a quick but thorough scrub. You want them clean and shiny. This tiny step is huge for performance, ensuring your new motor gets every bit of power it’s designed for and preventing issues down the road.
Aligning and Mounting the New Motor
This is the moment of truth for your drivetrain. The goal is to slide the new motor's splined shaft perfectly into the differential. It's a bit of a delicate dance. Carefully lift the motor—and remember, it's heavy—and guide it into position.
You'll likely need to gently rotate the motor shaft by hand until you feel the splines mesh together. When they line up, the motor will slide smoothly into place against the differential housing.
Whatever you do, don't force it. If it’s not going in, back it off, turn the shaft a fraction, and try again. Forcing it is a fast way to damage the splines on both the motor and the differential, turning this project into a much more expensive headache. Once it's sitting flush, get the mounting bolts started by hand to hold it steady.
Crucial Tip: Tighten the mounting bolts in a star pattern, just like you would with lug nuts on a car. This is non-negotiable. It guarantees the motor seats evenly against the differential, which prevents nasty vibrations and protects the bearings from premature wear. Use a torque wrench to tighten them to the manufacturer's specified ft-lbs.
Reconnecting the Electrical System
Now it's time to wire it all up and bring your cart back to life. This is where all that careful labeling you did earlier really pays off. Grab your photos and labeled cables and start reconnecting everything to the corresponding terminals on the new motor.
Start with the big, heavy-gauge cables—these are typically labeled A1, A2, F1, and F2 (or S1 and S2 on series motors). Check that every connection is clean, dry, and snug. A loose connection here is a big problem; it creates resistance, generates a ton of heat, and can seriously rob your cart of power. In a worst-case scenario, it can even melt the terminal post right off the motor.
For your safety, follow this connection order without fail:
- Reconnect all the motor cables first. Go back to your labels and photos and double-check that every single cable is on its correct terminal.
- Confirm everything is correct. I'm serious, check it one more time. Mixing up these main cables is the most common mistake people make, and it can instantly fry your brand-new motor or controller.
- Make sure the Tow/Maintenance switch is still set to "Tow."
- Finally, reconnect the main battery pack. Always connect the main positive cable first, then connect the main negative cable last.
Following this sequence keeps the high-voltage system isolated until the absolute last moment—a critical safety measure that’s easy to forget. With everything reconnected, you've officially finished the core of your golf cart motor replacement. All that's left is to test your work and enjoy the ride.
Alright, the new motor is bolted in and all the wires are looking good. You're in the home stretch of your golf cart motor replacement, but don't lower that jack just yet. This final phase—testing and troubleshooting—is where you make sure all that hard work paid off. It's a non-negotiable step to confirm your cart is safe, reliable, and ready to rip.
First things first, let's power this thing up the right way. Keep the Tow/Maintenance switch in the "Tow" position for now. Take one last look at your wiring—is every cable sitting snugly on its correct terminal? Good. Now, reconnect the main battery pack. Always connect the main positive cable first, then the main negative cable last. With everything secure, go ahead and flip that switch back to "Run."
The First Power-On Test
Deep breath—this is the moment of truth. Your cart should still be safely up on jack stands with the wheels clear of the ground. Turn the key and give the accelerator a gentle press, just enough to get the wheels spinning slowly.
Now, listen. What you want to hear is the clean, quiet hum of a happy new motor. Any clunking, grinding, or high-pitched whining is an immediate red flag and means you need to stop. Let the wheels spin in both forward and reverse to check for smooth operation in both directions.
Important Safety Check: A super common mistake after an install is getting the direction wrong—the cart tries to go forward in reverse, and vice-versa. Don't sweat it. This is almost always because the S1 and S2 (or F1 and F2) cables on the motor got swapped. Just flip the cart back to "Tow," disconnect the batteries, and switch those two cables. Problem solved.
Common Post-Installation Hiccups
Even the most careful mechanic runs into a snag now and then. If your cart isn't behaving, here's a quick rundown of the usual suspects and how to track them down.
- The Cart Won't Move at All: You hear the solenoid click, but the wheels don't turn. This almost always points to a bad connection. Before you do anything else, re-check every single cable terminal on both the motor and the controller. Make sure they are sparkling clean and tightened down. A single loose cable is the number one cause of this headache.
- It Runs Backwards: Like we mentioned, this is the classic sign of swapped directional cables. Your main cables are just reversed on the motor terminals. A quick swap will get you going in the right direction.
- Feels Sluggish or Overheats: Did you install a beefy high-performance motor? If it feels weak or is getting hot, your stock controller is probably screaming for help. A high-torque motor demands more amperage than a factory controller can deliver, which starves the motor and can lead to damage.
- Loud Grinding Noise: This is a big one. Stop immediately. A grinding sound often means the motor isn't aligned correctly and the splines aren't meshing properly with the differential. Continuing to run it like this can cause serious, expensive damage to your drivetrain.
Once you’ve systematically run through these checks and ironed out any issues, you can finish the job with confidence. Lower the cart, bolt the wheels back on, and take it for a slow, easy test drive. It's time to enjoy that new power you just installed.
Frequently Asked Questions
Even with the best guide in hand, a golf cart motor replacement can spark a few last-minute questions. It's totally normal. Here are some quick answers to the things people often wonder about right before they get their hands dirty.
How Long Does a Golf Cart Motor Replacement Take?
If you're pretty comfortable with a wrench, you can probably knock this out in 2 to 4 hours.
But if this is your first time tackling a job like this, or if you run into some stubborn, rusted-on bolts (which happens!), I'd suggest blocking off a full afternoon. Giving yourself that extra time means you can work at a steady pace without rushing the important steps.
Do I Need to Replace My Controller Too?
It's a really good idea, especially if you're upgrading your motor for more speed or torque. Think of it this way: your stock controller was designed for the old motor, and it often can't handle the increased amperage a high-performance motor demands.
This mismatch is a classic recipe for disappointment. You could get sluggish performance, or worse, you could end up frying your brand-new motor and controller. Always, always check the new motor's specs to see what kind of controller it needs to run safely and effectively.
The most frequent and costly mistake people make is mixing up the main motor cables when they put everything back together. Get them wrong, and your cart might suddenly run backward, not move at all, or completely burn out your new motor. A few pieces of labeled tape can save you a world of hurt.
If you've got more questions about this project or other golf cart repairs, our full FAQ page has a ton of other in-depth answers.
Ready to enjoy your walk on the course without the strain of pushing a heavy cart? The Caddie Wheel offers a simple, powerful, and affordable way to motorize your existing push cart. Learn more at CaddieWheel.com.
Share:
12 Best Golf Caddy Remote Options for 2025
Top 6 Golf Cart Battery Problems to Fix in 2025