
Thinking about swapping out your old golf cart batteries? A lithium battery conversion is one of the single best upgrades you can make. It involves replacing the heavy, high-maintenance lead-acid batteries with a modern, lightweight lithium-ion power source.
This isn't just a minor tweak. The upgrade delivers a huge boost in performance, from faster acceleration to a much longer range, all while getting rid of the constant watering and cleaning rituals. It’s the fastest way to make an older electric golf cart feel brand new.
Why Upgrade to Lithium? The Real-World Benefits
A golf cart lithium battery conversion is more than just swapping parts—it completely changes how your cart performs and how you use it. The benefits are obvious from the very first ride, going beyond specs on a sheet to deliver a better, more convenient experience every time you hop in.

Experience a Noticeable Performance Boost
The first thing you’ll feel is the massive weight reduction. A typical set of lead-acid batteries can weigh over 300 pounds. In comparison, a lithium battery with the same power often weighs less than 75 pounds. That’s like taking a large person out of your cart permanently.
Dropping over 225 pounds has a huge impact. Your cart will feel quicker off the line, handle more nimbly, and power up hills without struggling. This isn't just a small improvement; it transforms the driving experience, making it more responsive while also reducing long-term strain on your motor, suspension, and tires.
Another key advantage is how the power is delivered. Lead-acid batteries are notorious for "voltage sag," which is why your cart gets slower and slower as the battery drains. Lithium batteries, on the other hand, deliver consistent, full power right until they’re almost completely discharged. Your last mile will feel just as peppy as your first.
Say Goodbye to Constant Maintenance
Let’s be honest, one of the biggest chores of owning a cart with lead-acid batteries is the endless maintenance. You’re constantly checking water levels, scrubbing corrosive gunk off the terminals, and worrying about messy acid spills. A lithium battery conversion makes all of that a distant memory.
With a sealed lithium system, there is zero required maintenance. No watering, no cleaning, and no corrosion. You just install it and go, freeing up your time for what you actually want to be doing—golfing or cruising around.
A quick side-by-side look makes the choice pretty clear for anyone tired of the old routine.
Lead-Acid vs. Lithium Batteries At a Glance
| Feature | Lead-Acid Batteries | Lithium-Ion Batteries |
|---|---|---|
| Weight | Very heavy (300+ lbs) | Lightweight (< 75 lbs) |
| Maintenance | Requires regular watering and cleaning | Zero maintenance |
| Lifespan | 3-5 years | 10+ years (4,000+ cycles) |
| Performance | Voltage sags, power fades | Consistent power output |
| Charging Time | 8-10 hours | 2-3 hours |
| Efficiency | Lower efficiency, loses charge | Higher efficiency, holds charge |
| Upfront Cost | Lower | Higher |
| Long-Term Cost | Higher due to replacements | Lower due to longevity |
As you can see, while lead-acid might be cheaper at the checkout, lithium wins in almost every other category that matters for performance and convenience.
The Smart Long-Term Investment
While the initial cost for a lithium upgrade is higher, it’s a much smarter financial move in the long run. Think about it this way: lead-acid batteries need replacing every 3-5 years. A quality LiFePO4 (Lithium Iron Phosphate) battery, however, can last for over 10 years and 4,000+ charge cycles.
You’d likely go through three sets of lead-acid batteries before a single lithium battery needs to be replaced. If you're shopping around, our guide on the best lithium batteries for golf carts can help you find a quality option.
This shift toward long-term value is happening across the entire industry. The U.S. electric golf cart market was valued at USD 529.4 million in 2024 and is expected to hit USD 886.7 million by 2033. Much of that growth is driven by lithium technology, as fleet managers and individual owners alike are doing the math on total ownership costs. Understanding the wider world of e-mobility solutions shows this isn't just a trend for carts, but for electric vehicles of all kinds.
Choosing the Right Components for Your Conversion
A successful golf cart lithium battery conversion hinges on getting the right parts before you even pick up a wrench. Think of this as your pre-build checklist. Making smart choices here is what separates a smooth, powerful upgrade from a frustrating project that never quite performs as you hoped.
The whole thing starts with the battery itself. This is the heart of your new system, and not all lithium chemistries are created equal for this job.
Selecting the Ideal Lithium Battery Chemistry
While there are a few types of lithium-ion batteries out there, the hands-down winner for a golf cart conversion is LiFePO4 (Lithium Iron Phosphate). Its popularity isn't just a fad; it's rooted in some serious advantages in safety and longevity that make it perfect for the demands of a golf cart.
LiFePO4 batteries are famous for their thermal stability. In simple terms, they are far less likely to overheat compared to other chemistries like the NMC (Nickel Manganese Cobalt) batteries found in many EVs. This built-in safety is a massive plus.
They also offer an incredibly long cycle life, often rated for 4,000 or more charge-discharge cycles. That translates to more than a decade of reliable service for most people. If you want to dive deeper into the science, check out a comparative overview of Lithium Ion, LiFePO4, and Lithium Titanate batteries.
Sizing Your Battery Voltage and Capacity
Once you've settled on LiFePO4, the next puzzle is getting the size right. This boils down to two key numbers: voltage (V) and amp-hours (Ah).
-
Voltage (V): This one is non-negotiable. You must match the voltage of your cart's existing electrical system. Most modern carts from brands like Club Car, EZGO, and Yamaha run on either a 36V or 48V system. Double-check your cart's manual or the labels on your old lead-acid batteries to be certain. Using the wrong voltage can damage your cart's controller and motor or just won't work at all.
-
Amp-Hours (Ah): This is all about your cart's range. Think of it as the size of your new "gas tank." A higher Ah number means more juice and more miles per charge. For most golfers, a 100Ah battery is the sweet spot, giving you enough range for a couple of rounds (around 40-50 miles) on a typical course. If you live in a really hilly area or use your cart for heavy-duty hauling, stepping up to a 120Ah or 150Ah pack is probably a smart move.
Pro Tip: Don't just guess. Be honest about how you use your cart. A vehicle that just putts around a flat retirement community has completely different power needs than one that climbs steep hills on a sprawling golf course all day.
Demystifying the Battery Management System (BMS)
Every quality lithium battery pack comes with a Battery Management System (BMS). This little onboard computer is the battery's brain and bodyguard, and it's absolutely critical for safety and a long lifespan. You simply can't run a lithium battery without one.
The BMS is constantly monitoring the health of every single cell inside the battery pack. Its main jobs are to protect the battery from common dangers:
- Overcharging: It cuts off power from the charger when the battery is full.
- Over-discharging: It shuts the battery down before it drains to a dangerously low level.
- Over-current: It protects against short circuits or drawing too much power at once.
- High temperatures: It keeps an eye on heat and will shut things down to prevent damage.
A good BMS ensures your expensive new battery operates within safe limits, which is key to getting the most life out of it. When you're comparing battery kits, always look for one with a high-quality, reputable BMS.
Ensuring Charger Compatibility
This is one of the most common—and most dangerous—mistakes people make. You absolutely cannot use your old lead-acid battery charger. I'll say it again: do not even think about it. It’s a serious safety risk.
Lead-acid chargers use a charging profile designed specifically for that old-school chemistry. If you hook one up to a lithium battery, you will damage the cells and could even start a fire. You have to buy a charger that is specifically designed for your new LiFePO4 battery's voltage.
We put together a helpful guide on finding the right lithium battery charger for your golf cart that dives into more detail.
When you're shopping, look for a "smart charger." These are designed to communicate with the battery's BMS to deliver the perfect amount of voltage and current for a safe and efficient charge. Matching your charger to your battery is the final, crucial piece of the puzzle.
Your Step-By-Step Installation Guide
Alright, you’ve picked your components and gathered your tools. Now for the fun part: the physical transformation of your golf cart. I'm going to walk you through the entire conversion process, breaking it down into a few manageable stages. Just follow these steps, keep safety front and center, and you'll have your new lithium system humming in a couple of hours.
This flow chart gives you a simple visual for how to pick your core components—the battery, BMS, and charger. It’s a sequential process, and it all starts with the battery.
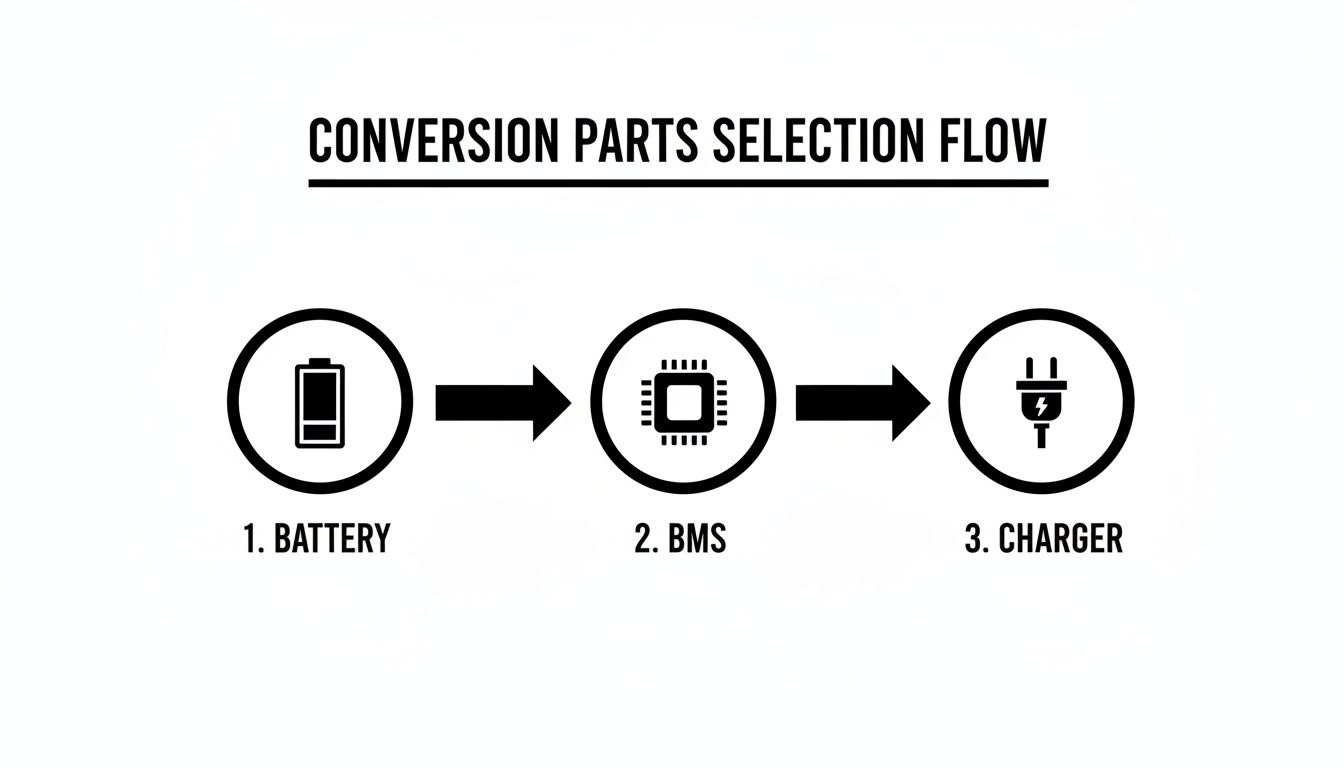
As you can see, your battery choice dictates the specs you'll need for both your BMS and your charger.
Safety and Prep Work
Before you even think about touching a wire, let's talk about safety. This is non-negotiable. You're dealing with an electrical system that can pack a serious punch, so take a minute to get your workspace and yourself ready. Always wear safety glasses and a good pair of insulated gloves.
First things first, make sure your cart is parked on a flat, stable surface. Engage the parking brake and take the key out of the ignition. If your cart has a "TOW" switch, flip it into tow mode now. This is a crucial step that deactivates the motor controller's regenerative braking and prevents any surprise movements.
Now for the most important safety step: disconnecting the old battery system. Always disconnect the main negative (-) terminal first, followed by the main positive (+) terminal. This specific order is your best defense against accidental short circuits, which can happen if your wrench touches the metal cart frame while you’re loosening the positive terminal.
Removing the Old Batteries
Get ready for some heavy lifting. Those old lead-acid batteries are beasts, with each one typically weighing 60 pounds or more. Do your back a favor and ask a friend to help you lift them out.
Before you start unhooking all the jumper cables that link the batteries together, pull out your phone. Take several clear pictures of the wiring from different angles. Then, grab some masking tape and a marker to label every single cable based on its terminal connection (e.g., "Battery 1 Positive," "Battery 2 Negative"). Trust me, this five-minute task can save you hours of headaches later.
With everything documented and labeled, go ahead and disconnect all the jumper cables. Once the wires are clear, carefully lift each lead-acid battery out of the tray. Remember, these things contain corrosive acid, so handle them with care.
Preparing the Battery Tray
With the old batteries out, you’ll probably find a collection of dirt, leaves, and maybe some acid corrosion in the battery compartment. Now is the perfect time to give it a good cleaning.
Whip up a simple mixture of baking soda and water to neutralize any spilled battery acid. You’ll see it fizz—that’s the science doing its thing. Once the fizzing stops, wipe the area clean with a damp cloth and let it dry completely. A clean tray is key to preventing future corrosion problems.
Your new lithium battery is a featherweight compared to the six or eight lead-acid bricks it's replacing, so it won't fill the entire tray. You have to secure it properly to keep it from sliding around. Many lithium conversion kits come with custom mounting brackets made for specific cart models, which is ideal.
If your kit didn’t include brackets, you can use high-density foam blocks to wedge around the battery, creating a snug and secure fit. The main goal here is to make sure that battery is completely immobile. A secure battery is a safe battery.
This is also a great time to inspect the main power cables you labeled earlier. Look for any signs of fraying, cracking, or corrosion on the terminal ends. If they look tired, now is the best and easiest time to replace them with fresh, high-quality cables.
Before we dive into the installation of your new system, it's helpful to have everything you'll need organized and within reach. This checklist covers all the essential tools and materials for the job.
Essential Tools and Materials Checklist
| Category | Item | Purpose |
|---|---|---|
| Safety Gear | Safety Glasses | Protects eyes from debris and accidental sparks. |
| Insulated Gloves | Protects hands from electrical shock and battery acid. | |
| Hand Tools | Socket/Wrench Set | For loosening and tightening battery terminal nuts. |
| Wire Brush | Cleaning corrosion from battery terminals and cable ends. | |
| Screwdriver Set | For removing and installing mounting brackets or covers. | |
| Pliers | General purpose for handling wires and connectors. | |
| Cleaning Supplies | Baking Soda | To neutralize any spilled battery acid. |
| Water | For mixing with baking soda and general cleaning. | |
| Rags or Paper Towels | For cleaning the battery tray and wiping up spills. | |
| Installation Materials | Masking Tape & Marker | Labeling cables before disconnection to ensure correct reassembly. |
| Zip Ties | To secure and organize wiring for a clean installation. | |
| Mounting Brackets or Foam Blocks | To securely hold the new, smaller lithium battery in place. | |
| Optional but Recommended | Voltmeter/Multimeter | To verify voltage and confirm connections are correct. |
| Torque Wrench | To tighten terminal connections to the manufacturer's specifications. | |
| Battery Terminal Protector Spray | To prevent future corrosion on the new terminals. |
Having these items ready will make the whole process smoother and more professional.
Wiring Your New System
You're in the home stretch! With your new battery securely mounted, it's time to make the connections. The good news is that wiring a single lithium pack is far simpler than daisy-chaining a bunch of lead-acid batteries.
Always refer to the manufacturer's wiring diagram that came with your battery. In most cases, you’ll be connecting the main positive and negative cables from your cart directly to the corresponding terminals on the new battery.
- Connect the main positive (+) cable from your cart's controller to the positive terminal on your lithium battery. Make sure the connection is snug and secure.
- Connect the main negative (-) cable to the negative terminal. Again, tighten it down firmly to prevent any electrical arcing.
CRITICAL: Double-check, then triple-check your polarity before making that final connection. Reversing the polarity—connecting positive to negative—even for a split second can fry your new battery, the BMS, and your cart's controller. It's an expensive mistake.
If you have an external BMS, you'll need to connect it according to its specific instructions. This typically means running the main battery leads through the BMS and attaching a series of smaller monitoring wires. However, most modern "drop-in" lithium batteries have an integrated BMS, which makes the installation process incredibly straightforward.
This move toward simpler, more powerful lithium technology is a huge trend in the global golf cart battery market, a sector valued between USD 145.1 million and USD 181.36 million in 2024. While lead-acid batteries still held a 67.3% market share due to their low upfront cost, lithium systems are rapidly gaining ground. Fleet managers and private owners are choosing them for their superior long-term performance and near-zero maintenance. To see why this conversion is becoming so common, you can explore additional insights into the evolving golf cart battery market.
Analyzing the Costs and Long-Term Value
Let's get right to it and talk numbers. For most people thinking about a lithium conversion, the sticker price is the biggest hurdle. And yes, the upfront cost is definitely higher than a new set of lead-acid batteries. But if you only look at that initial number, you’re missing the bigger picture of long-term value.
When you budget for this upgrade, remember you're not just buying a battery. You're investing in a complete system where every part is designed to work together.
Breaking Down the Upfront Investment
Going with a complete conversion kit is the easiest and most common way to get everything you need in one box. For a quality 48V 100Ah LiFePO4 system—a super popular size for Club Car, EZGO, and Yamaha carts—you’ll find prices fall into a predictable range.
Here’s what you're typically paying for:
- The Lithium Battery Pack: This is the biggest piece of the pie, usually running from $900 to $1,800. The price varies based on the brand, capacity (Ah), and the quality of the built-in Battery Management System (BMS).
- A Compatible Lithium Charger: Your old lead-acid charger won't work. A new, dedicated smart charger designed for lithium will add another $150 to $300 to the bill.
- Mounting Brackets and Hardware: A good kit includes model-specific brackets for a clean, secure fit. This is easily a $50 to $100 value.
- The Small Stuff: This includes things like a state-of-charge meter, new cables, or busbars, which can tack on another $50 to $150.
When you add it all up, a comprehensive DIY kit for a standard 48V cart often lands somewhere between $1,200 and $2,200. Sure, that might feel steep compared to the $600-$900 for new lead-acid batteries, but the financial story changes dramatically once you look past year one.
Calculating the Total Cost of Ownership
The real magic of a lithium conversion is in its longevity and efficiency. This is where we stop looking at the purchase price and start thinking about the Total Cost of Ownership (TCO)—a much smarter way to compare these two technologies.
A set of lead-acid batteries will typically last you 3-5 years with normal use and proper maintenance. A quality LiFePO4 battery, on the other hand, is rated for 4,000+ charge cycles and can easily last 10 years or more.
Let's do some quick math. Over a 10-year period:
- Lead-Acid: You're looking at replacing your batteries at least twice, maybe even three times. At an average of $800 per set, that’s $1,600 to $2,400 in replacement costs alone.
- Lithium: You buy it once. Your total cost for the battery system over that same decade is your initial investment of $1,200 to $2,200.
Even at the high end of the initial cost, the lithium battery often pays for itself by the time you would have bought your third set of lead-acid batteries. And this simple calculation doesn't even factor in the "soft" savings.
The Hidden Financial Benefits
Beyond just avoiding replacement costs, lithium saves you money in other, less obvious ways. These little savings add up over the life of the battery.
- Zero Maintenance Costs: You can throw away your hydrometer and stop buying distilled water. More importantly, your time is valuable. Think of all the hours you'll save by not having to top off water levels and clean corroded terminals every month.
- Improved Electrical Efficiency: Lithium batteries are just plain better at taking and holding a charge. They charge faster and waste less electricity in the process, which means a lower power bill. Many users see up to 25% less energy used per charge cycle.
Once you factor in replacements, maintenance, and energy savings, the financial argument for a golf cart lithium battery conversion becomes incredibly compelling. That initial price tag is exactly that—an investment that pays you back with better performance, zero hassle, and lower long-term expenses.
For a deeper dive, check out our complete golf cart battery replacement cost guide for an even more detailed analysis.
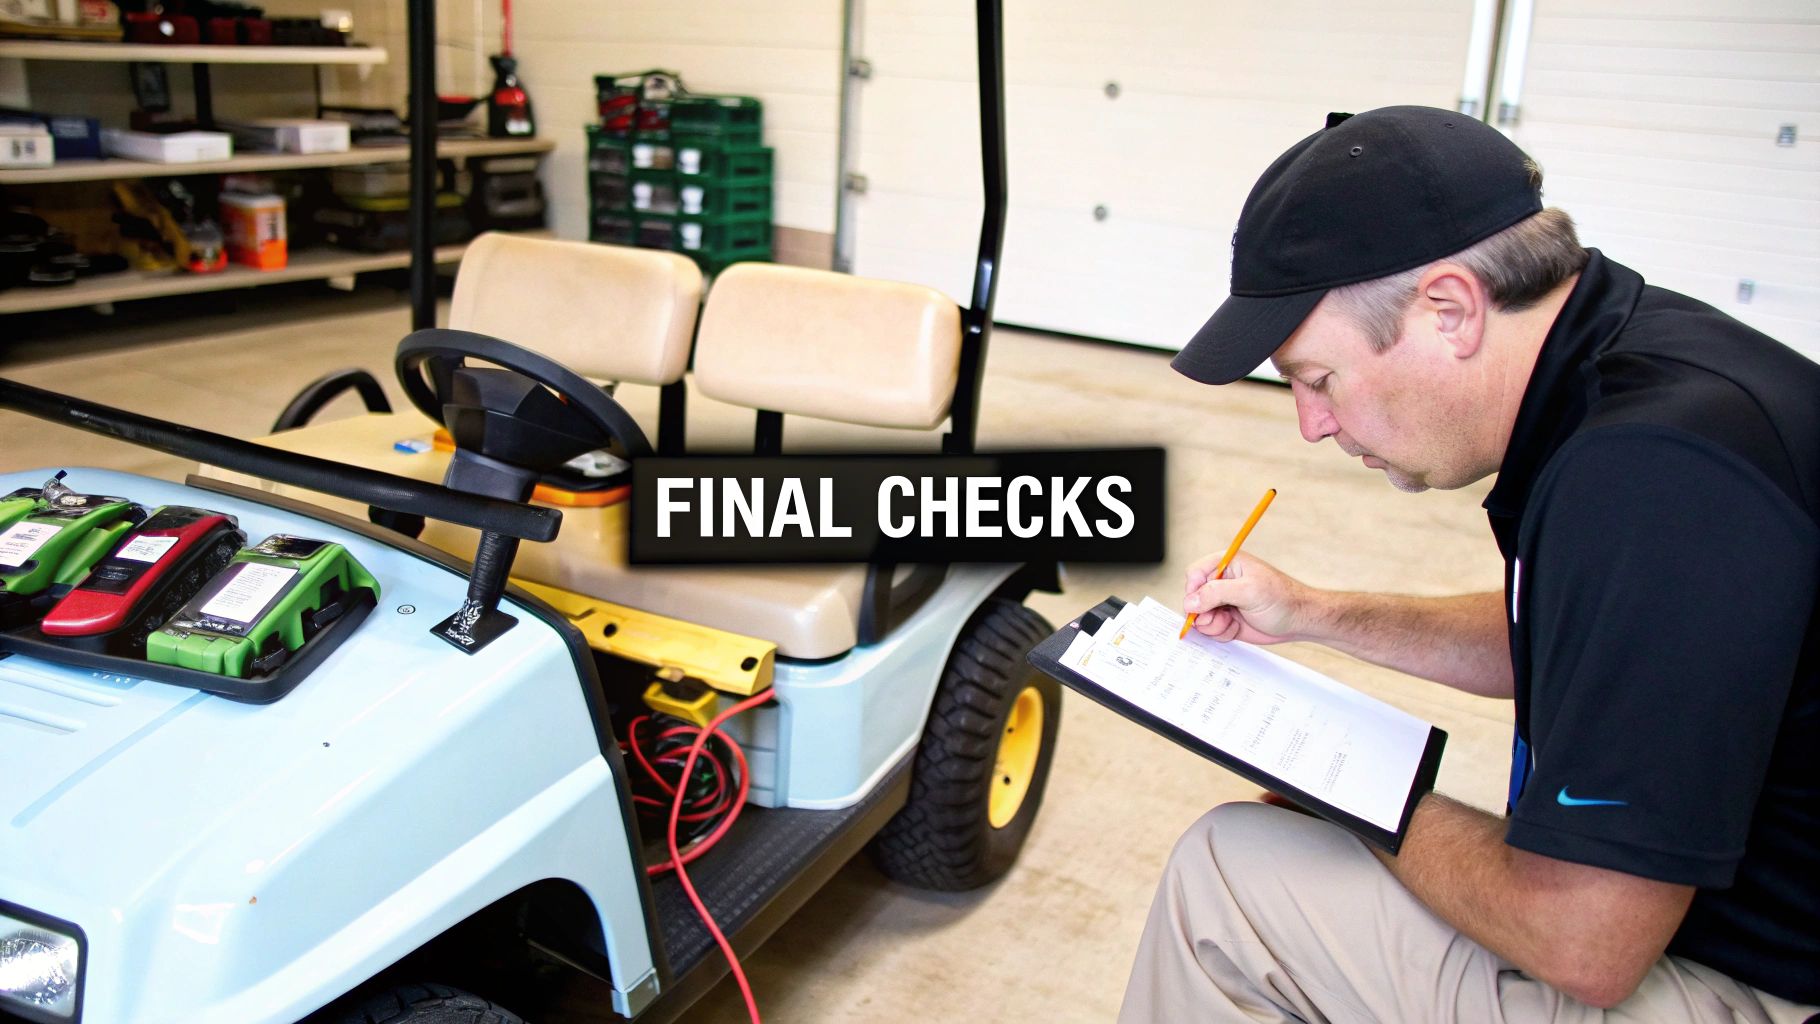
Post-Installation Checks and Troubleshooting
Alright, the hard part is over—your new lithium battery is in! But before you hit the golf paths, there are a few final checks to make sure everything is running smoothly. This isn't just about flipping a switch; taking a few minutes now ensures your conversion is safe, reliable, and ready to perform from day one.
The First Charge Protocol
This is a big one. Your new battery needs a full, uninterrupted charge cycle right out of the box. Think of it as waking the battery up and getting all its internal cells on the same page. Grab your new lithium-specific charger, plug it in, and let it do its thing until it's 100% complete.
During this first charge, just keep an eye on things. It's perfectly normal for the charger and battery to get a little warm, but they should never be too hot to touch. This initial cycle allows the BMS (Battery Management System) to calibrate and properly balance the voltage across all the cells, which is absolutely vital for a long and healthy battery life.
A Simple Performance Testing Plan
Once you've got a full charge, it's time for a test drive. Resist the urge to floor it immediately. A more gradual approach will tell you if every component, from the motor controller to the BMS, is happy with its new power source.
Here’s a quick checklist to run through:
- Low-Speed Level Ground Test: Find a nice, flat, open area. Drive the cart forward and then in reverse at a low speed. Listen for any weird noises from the motor and feel for smooth acceleration. This confirms all your basic connections are solid.
- Hill Climb Test: Next, find a decent hill. Driving up an incline is the best way to see how the BMS handles a high-current situation. The cart should feel strong and pull steadily without any sputtering or sudden power drops.
- Braking and Regeneration Test: If your cart has regenerative braking, test it out by coasting down that same hill. You should notice the cart slowing itself down as the motor captures energy to send back to the battery.
Key Insight: Don't panic if the cart suddenly shuts off during a tough test, like accelerating up a steep hill. This is usually the BMS doing its job perfectly, protecting the battery from an over-current event. Just turn the key off, wait a beat, and turn it back on. This typically resets the BMS, and you'll be good to go.
Common Troubleshooting Scenarios
Even with the most careful installation, a little hiccup can happen. Here’s how to quickly diagnose and fix the most common issues after a lithium battery conversion.
Scenario 1: The Cart Won’t Power On at All
This happens more often than you'd think, and it's almost always an easy fix. Before you start pulling your hair out, check these things:
- Check the BMS Cutoff: Many lithium batteries ship in a "sleep" mode to conserve power. You might need to press a reset or "wake" button on the battery itself, or simply connect the charger for a moment to activate the BMS.
- Verify Main Connections: Go back and double-check that your main positive and negative cables are tight and on the correct terminals. It’s surprisingly easy to reverse them by mistake.
- Inspect the Tow/Run Switch: We’ve all done it. Make sure you flipped your cart's tow/run switch back to the "Run" position.
Scenario 2: Power Cuts Out Unexpectedly During Use
If your cart just dies mid-drive, especially when you're accelerating hard or going up a hill, the BMS is likely stepping in to protect the battery pack. This is a safety feature, not a failure. It happens when you draw too much current at once.
Just let the cart sit for a minute, then cycle the key off and on. Power should return. This kind of smart power management is a major reason why lithium is taking over, not just in golf but globally. The Asia-Pacific region, for instance, has become the fastest-growing market for golf cart batteries, fueled by its tourism and real estate sectors. This trend highlights how lithium power is pushing into all sorts of personal mobility, sparking new product innovations. You can read the full research on these global market dynamics to see just how big this shift is.
Your Top Questions About Lithium Conversions, Answered
Jumping into a project like a golf cart battery conversion is exciting, but it’s natural to have a few questions. To be honest, we hear the same handful of concerns from most DIYers.
Let's clear the air on these common sticking points. Getting these answers sorted out now will give you the confidence to move forward and help you sidestep some simple but costly mistakes.
Can I Get Away With Using My Old Lead-Acid Charger?
This is probably the most critical question we get, and the answer is a hard no. You absolutely cannot use your old charger. It’s not a matter of "if" it will cause problems, but "when."
Lead-acid chargers are built on a completely different charging algorithm. Using one on a lithium battery will not only cause serious damage but also creates a major safety risk. Think of it like putting diesel in a gasoline engine—it's a recipe for disaster. You have to invest in a charger designed specifically for your new battery's chemistry (LiFePO4) and voltage. Skimping on this will instantly void your new battery’s warranty.
How Do I Figure Out the Right Battery Size (Amp-Hours)?
Amp-hours, or Ah, is the number that tells you how much juice you have in the tank. It’s the new measure of your cart’s range on a single charge. The right size really just comes down to how you plan to use your cart.
For the vast majority of golfers and neighborhood cruisers, a 100Ah lithium battery is the sweet spot. This typically gives you more than enough range for a couple of rounds of golf—think somewhere in the 40-50 mile range on an average course.
You might want to think about a bigger battery if you:
- Live in a community with steep hills or use your cart for towing and heavy hauling.
- Often load it up with multiple passengers and a bunch of gear.
- Simply want the peace of mind that comes with maximum range.
If any of those sound like you, stepping up to a 120Ah or 150Ah pack is a smart move. When in doubt, always double-check the battery manufacturer's recommendations for your specific cart model.
Is This a Brutal DIY Project?
Honestly, for anyone with basic mechanical and electrical skills, this is a very doable weekend project. If you know your way around a wrench and can confidently tell a positive terminal from a negative one, you’ve got this.
The whole process really boils down to three main phases: yanking out the old, heavy batteries, securing the new lightweight one, and connecting a handful of main cables. Careful planning, labeling your wires as you go, and putting safety first are the real keys to success. That said, if you’re not comfortable working around electrical systems, hiring a qualified tech is always the best and safest call.
Will Swapping to Lithium Void My Cart’s Warranty?
That’s a totally valid concern, especially if you have a newer cart. The short answer is, it might. A major modification like a golf cart lithium battery conversion could potentially void the original manufacturer's warranty. It is absolutely crucial to read through your specific warranty terms before you start turning wrenches.
Now, if you have an older cart that’s already out of warranty, you have nothing to worry about. Better yet, your new lithium battery system will come with its own separate warranty directly from the battery manufacturer, so your investment is still protected.
If you're looking for a serious performance upgrade for your golf game without the full conversion project, Caddie Wheel offers a powerful and incredibly simple alternative. Learn more about how our electric-assist wheel can transform your push cart and your game.
Share:
How to Charge a Golf Cart for Maximum Battery Life
A Golfer's Guide to the Battery Gauge for Golf Cart