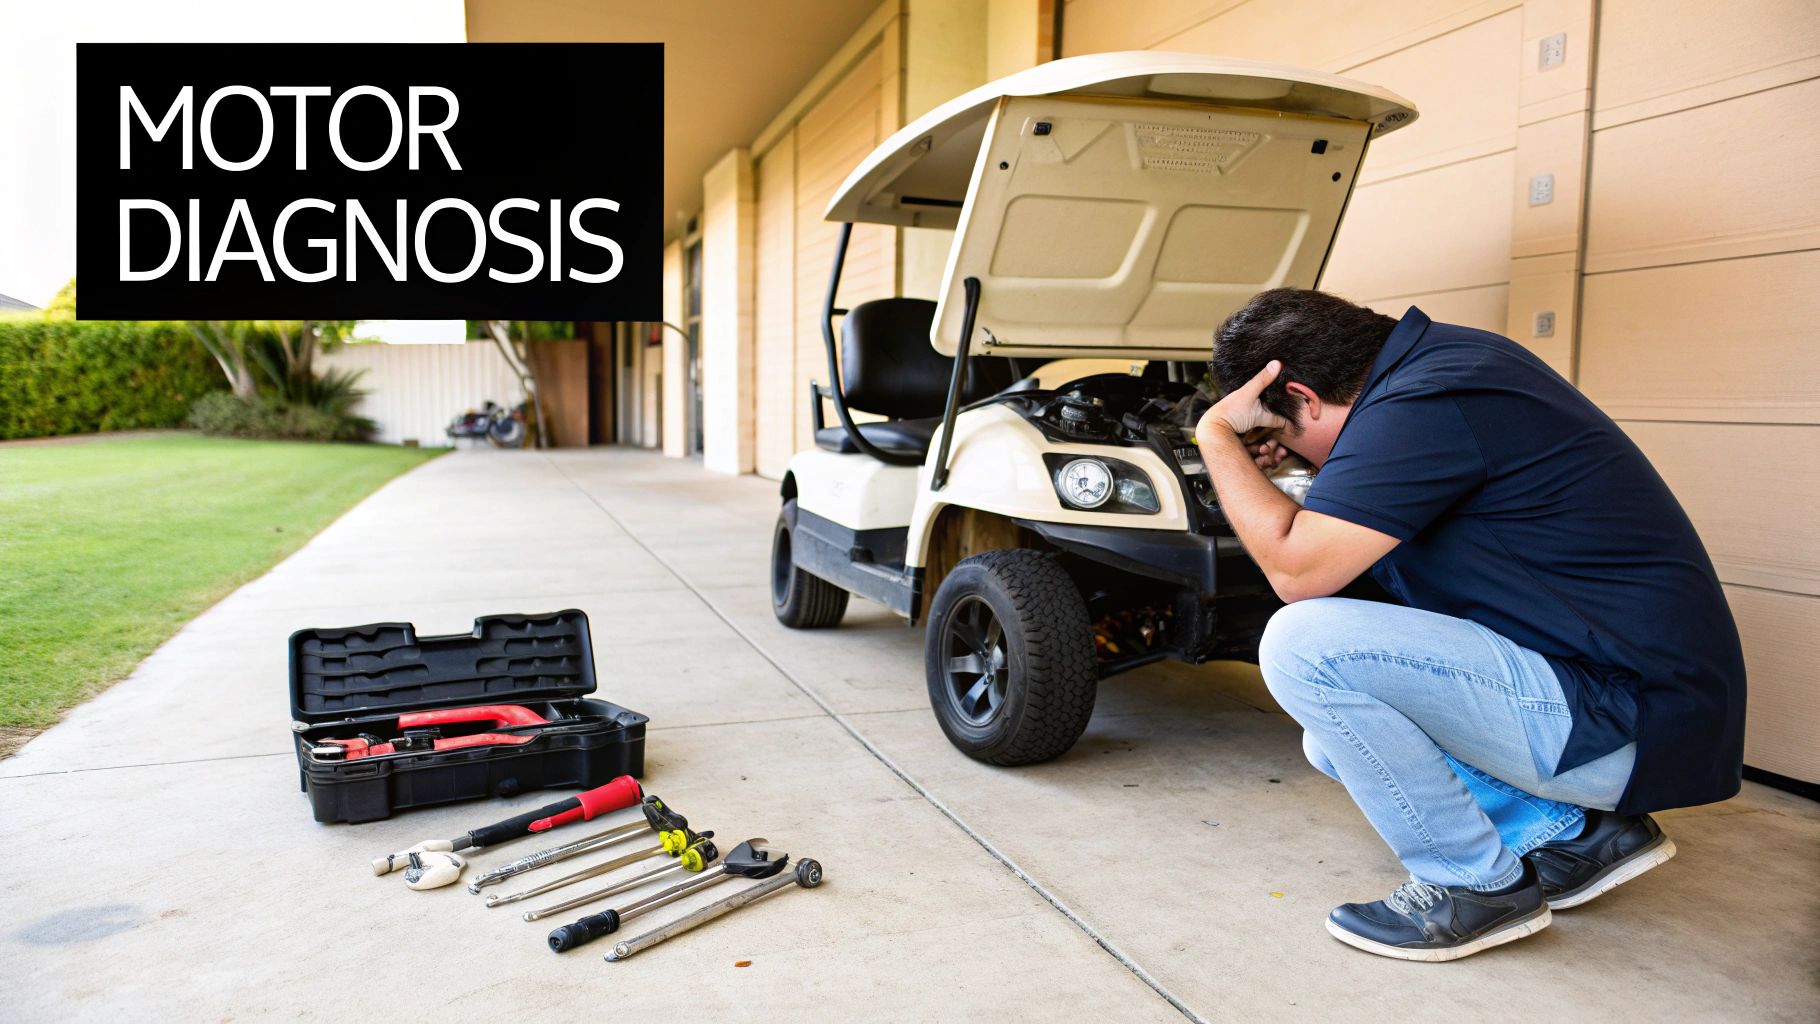
Before you even think about picking up a wrench, figuring out what’s actually wrong with your golf cart motor is the single most important part of any golf cart motor repair.
Getting this right is the difference between a five-minute fix and a weekend-long headache. Why? Because the classic signs of a dying motor—like sluggish speed or a complete refusal to move—can easily be mistaken for a bad controller, weak batteries, or a simple wiring issue. A little investigation upfront will save you a ton of time, money, and frustration down the road.
Uncovering the Root of Your Golf Cart Motor Problem
When a golf cart starts acting up, everyone's first instinct is to blame the motor. But more often than not, it’s just the messenger, not the culprit. The key is to use a methodical diagnostic process to isolate the real problem by ruling out the other usual suspects one by one. This same logic applies whether you're working on a full-sized golf cart or a motorized push cart assist like a Caddie Wheel.
With electric carts becoming more popular than ever, this kind of know-how is invaluable. The North American golf cart market was valued at around USD 1.21 billion and is expected to climb to USD 1.64 billion by 2030. As all these carts get older, good maintenance becomes non-negotiable.
Initial No-Tool Diagnostic Checks
You'd be surprised how much you can learn just by using your eyes and ears—no fancy equipment needed. These simple checks can help you narrow down the possibilities right away.
- Listen for the Solenoid Click: Press the accelerator pedal. You should hear a solid "click" from the solenoid. If you hear silence, the problem isn't your motor; it's something electrical before the motor. Think key switch, ignition, or the solenoid itself.
- Check for Free-Wheeling: Put the cart in "Tow/Maintenance" mode and give it a push. If the wheels are completely seized or incredibly difficult to turn, you might be looking at a locked-up motor or a problem in the differential.
- Observe Any Unusual Noises: Grinding, whining, or clunking sounds when the cart tries to move are often a dead giveaway. These noises usually point directly to internal motor problems, like shot bearings or a damaged armature.
Pro Tip: Never underestimate the power of your senses. A distinct burning smell is a major red flag, often pointing to an overheating motor or fried wiring. Shut everything down immediately to prevent serious damage.
Differentiating Motor, Controller, and Battery Failure
Misdiagnosing the problem is the most common trap people fall into. For example, a weak battery pack can absolutely mimic a failing motor by not providing enough juice, resulting in slow, sluggish performance. Likewise, a faulty controller—the cart's "brain"—can fail to send power to the motor at all, leaving you stranded.
Before you start tearing into the motor, cover your bases. Make sure the battery pack is fully charged and all the connections are clean, snug, and free of corrosion. Sometimes, the fix is as simple as a blown fuse. For a deeper dive, check out our guide on troubleshooting https://caddiewheel.com/blogs/golf-content/golf-cart-fuses.
This systematic approach isn't just for golf carts. Professionals use similar strategies for industrial equipment repair to diagnose complex machinery efficiently. Adopting that same problem-solving mindset is your best tool for any DIY repair.
To help you connect the dots, here’s a quick reference table matching common symptoms to their likely causes.
Common Symptoms and Their Likely Causes
Use this quick reference table to connect your cart's symptoms to the most probable underlying problem.
| Symptom | Likely Motor Issue | Potential Controller Issue | Possible Battery or Wiring Issue |
|---|---|---|---|
| No Movement, No Click | Unlikely | Possible controller failure | Most likely; check key switch, solenoid, fuses, wiring |
| No Movement, But "Click" is Heard | Possible motor failure (brushes, armature) | Likely controller failure | Possible; check main power cables from battery/controller |
| Sluggish Performance / Lack of Power | Worn brushes, weak motor field | Possible programming issue or failure | Very likely; weak batteries, poor connections |
| Jerky or Hesitant Acceleration | Bad spot on the armature | Common controller symptom | Loose wiring, bad throttle sensor |
| Loud Grinding or Whining Noise | Very likely; failed bearings, internal damage | Unlikely | Unlikely, unless related to loose components |
| Burning Smell | Motor is overheating, windings are shorting | Controller is overheating or failing | Wires are shorting, connection is arcing |
This table should give you a solid starting point. By observing the symptoms carefully, you can zero in on the right area to begin your more detailed testing.
Gearing Up: Your Workspace for Motor Repair
Trying to fix a golf cart motor without the right tools is a recipe for frustration. It's like heading out for 18 holes with nothing but a sand wedge—you might make some progress, but it's going to be slow, aggravating, and you'll probably do more harm than good.
Setting up your workspace properly turns a potential nightmare into a project you can actually handle. You don’t need a full-blown mechanic's garage, but a few key items are absolutely non-negotiable for doing the job safely and correctly.
The Must-Have Toolkit
These are the essentials you’ll reach for on just about any repair. My advice? Don't cheap out here. A budget socket that strips a critical bolt will cost you way more in time and headaches than a decent toolset ever will.
- A Solid Socket and Wrench Set: You'll want a kit with both metric and SAE (standard) sizes because you never know what the manufacturer used. If you can spring for them, ratcheting wrenches are a lifesaver in those tight spots around the motor housing.
- Digital Multimeter: This is your secret weapon for any electrical problem. It's the only way to accurately test voltage, continuity, and resistance in the motor, controller, and wiring. Without a good multimeter, you’re just guessing, and that’s a dangerous game.
- Screwdriver and Plier Assortment: Seems basic, but a good variety of Phillips and flat-head screwdrivers, plus some needle-nose and standard pliers, will be in your hands constantly. You'll need them for everything from popping off covers to disconnecting wires and holding small parts steady.
Specialized Tools for Going Deeper
Once you get past the initial checks and start tearing things down, a couple of specialized tools become incredibly important. These are the tools that separate a straightforward fix from a catastrophic mistake.
For example, if you think you've got a bad bearing, you need the right gear to get it off.
Trust me on this: Never, ever try to bash a bearing off with a hammer and a screwdriver. You’re almost guaranteed to damage the motor shaft or crack the casing, turning a simple parts swap into a full motor replacement.
When the job calls for it, make sure you have these in your arsenal:
- Snap Ring Pliers: Absolutely essential for getting off the snap rings that secure bearings and other components onto the motor shaft.
- Bearing or Gear Puller: This is the only professional, safe, and effective way to remove a pressed-on bearing without mangling the shaft or the bearing itself.
- Torque Wrench: This is non-negotiable for reassembly. Motor casings and mounting brackets must be tightened to the manufacturer’s exact specs. Too loose, and they'll vibrate apart. Too tight, and you can strip threads or warp the housing. A torque wrench gets it just right.
Motor Disassembly and Internal Inspection
Alright, with your tools laid out and your workspace clear, it's time to get our hands dirty and dive into the motor itself. This is the part where we pull the motor, crack it open, and do a little detective work to find out exactly what went wrong. Don't let it intimidate you—if you're methodical, you'll be just fine.
First things first, and this is non-negotiable: kill the power. Find your cart's main battery pack and disconnect the main positive and negative cables. This isn't just a friendly tip; it's a critical safety step to prevent a nasty electrical short that could wreck your components or, worse, give you a serious shock.
This little diagram shows the three main tools you’ll need for this job.
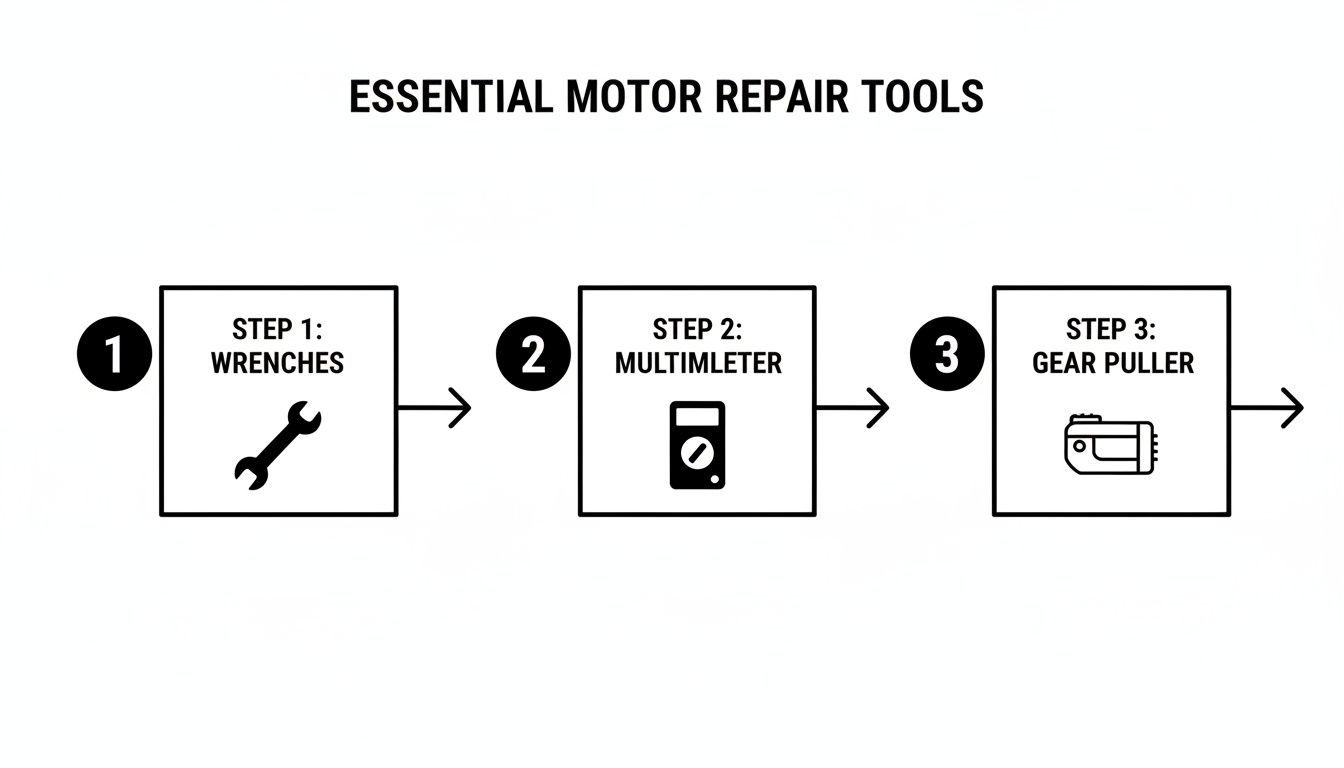
Having a good set of wrenches, a reliable multimeter, and the right puller on hand means you’re equipped to handle the mechanical, electrical, and precision work ahead.
Removing the Motor from the Cart
With the power safely cut, you can start wrestling the motor out. Grab some painter's tape and a marker, and meticulously label every single cable attached to the motor terminals—think "A1," "F1," "B+," etc. Trust me, this small step now will save you a massive headache during reassembly.
Once everything is labeled, go ahead and disconnect the cables. These are high-amperage wires, so the nuts will be on there tight. A pro tip is to use one wrench to hold the inner nut on the terminal stud while you loosen the outer one. This keeps the whole stud from spinning and getting damaged. With the cables free, you can unbolt the motor from the differential. Brace yourself—these things are surprisingly heavy, often tipping the scales at 40-60 pounds. Get a solid grip before you pull that last bolt.
It’s no secret that electric carts are taking over. They now account for a whopping 81.81% of all golf cart sales, which puts a huge emphasis on keeping these motors running. With North America projected to make up about 58.5% of the global market by 2035, the trend is shifting toward rebuilding motors instead of replacing carts. That’s great news for DIYers like us.
Opening the Motor Casing for Inspection
Get the motor onto your workbench, and let the real investigation begin. Most DC motors are held together by a couple of long bolts running through the casing. Before you touch them, take a permanent marker and draw a "witness mark" across the seams where the end caps meet the main housing. This is your cheat sheet for lining everything back up perfectly later.
Now, remove those long bolts. You might need to gently tap the end cap with a rubber mallet to break the seal. Usually, the armature and the brush assembly will slide out with one of the end caps. The basic principle is similar across many motors, but if you want to geek out on the different types, our guide on AC motors for golf carts is a great place to start.
Crucial Tip: Take photos at every single step of disassembly. I can't stress this enough. Two days from now, when you're wondering which way a washer was facing or how a wire was routed, those photos will be your best friend.
What to Look for Inside the Motor
Once the case is open, you’re basically on a treasure hunt for signs of failure. A systematic check is the only way to make sure you catch everything, not just the most obvious problem.
- Motor Brushes: These are the number one wear-and-tear item. Check their length. If they're worn down to less than 1/4 inch, it's time for a new set. Make sure they can still slide freely in their holders, too.
- The Armature and Commutator: The armature is the spinning heart of the motor. You'll want to inspect the copper bars of the commutator—that’s where the brushes make contact. Look for any deep grooves, burn marks, or blackened segments. A healthy one should look smooth and have a nice coppery-brown color.
- Bearings: Give the bearings at both ends of the armature shaft a spin. They should feel buttery smooth and be completely silent. Any hint of grinding, roughness, or wobble means they're shot and need replacing.
- Field Coils and Wiring: Look for any signs of overheating. Discolored, melted, or brittle insulation on the wires is a red flag. If you get a whiff of that distinct burnt-electronics smell, you've almost certainly found a shorted-out coil.
Finally, keep all your screws, bolts, and tiny parts organized. Labeled magnetic trays or even just old yogurt containers work great. Losing one specific screw can bring your whole project to a grinding halt, so a little discipline here goes a long way.
Testing Components and Sourcing Parts
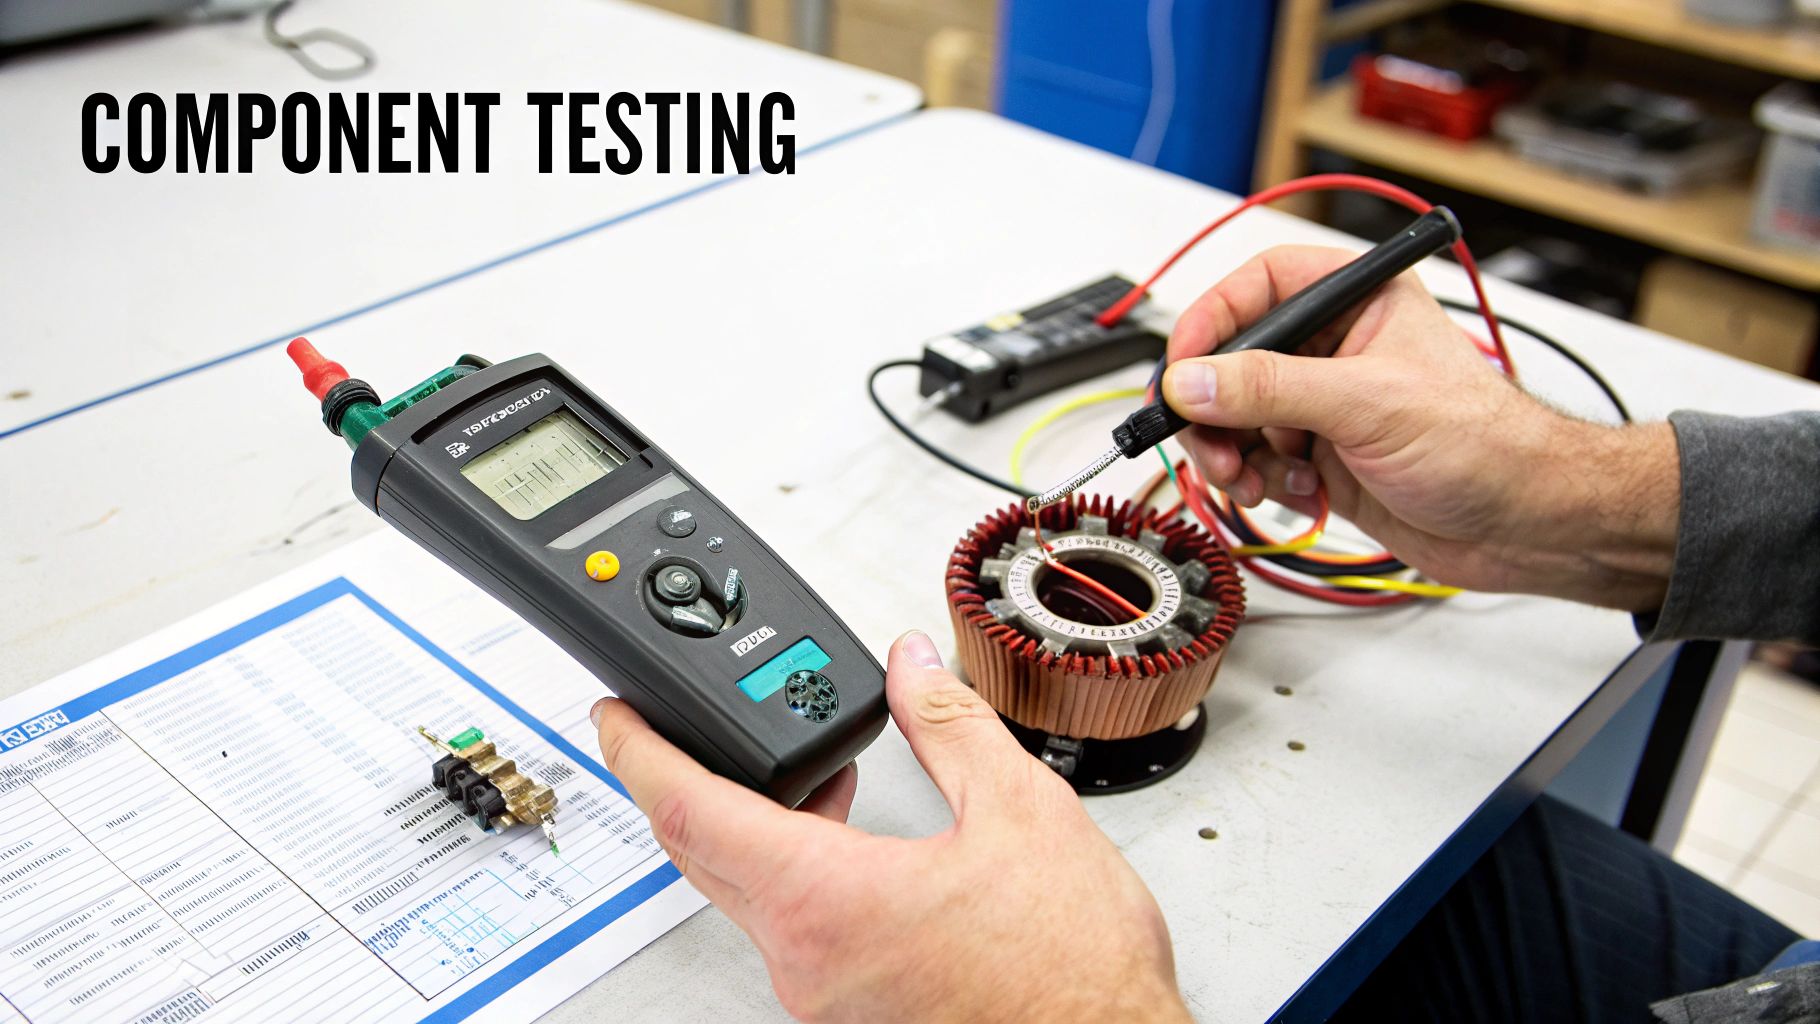
Alright, with the motor on your workbench, you’ve officially moved from the garage into the operating room. This is where a bit of methodical detective work with a multimeter will tell you exactly what’s wrong, so you only replace the parts that have actually failed.
You don't need to be an electrical engineer for this part, but you do need to be systematic. We're going to test the big three: the armature, the field coils, and the brushes. One of them is likely the weak link.
Using a Multimeter for Component Testing
Your multimeter is your best friend at this stage. You’ll mostly use the resistance setting (measured in ohms, Ω) to look for continuity and shorts. A reading of "OL" (Open Loop) or infinity on the display means there's a break somewhere in the circuit. On the flip side, a reading near zero ohms points to a direct short.
Here's the step-by-step for checking the key internal components:
- Armature Test: Set your multimeter to its lowest ohms setting. Touch one probe to any commutator bar and the other probe to a clean spot on the armature shaft. You should get an "OL" reading. If you see any continuity at all, it means the armature is shorted to ground. It's toast.
- Commutator Bar-to-Bar Test: Keep the probes on the commutator, touching two bars that are right next to each other. You should get a very low but consistent resistance reading. Now, just work your way around the entire commutator, testing each adjacent pair. If a reading is wildly different from the others or shows "OL," you've found a bad winding.
- Field Coil Test: Find the terminals for the field windings—they’re usually labeled S1 and S2. Test for continuity between them. A healthy coil will show a low resistance, typically between 1 and 5 ohms. An "OL" reading here means the coil winding is broken. Next, test from each terminal to the motor case; this should give you an "OL" reading, proving there are no shorts.
A critical takeaway from any golf cart motor repair is that one bad part rarely means the whole motor is junk. I've seen countless carts brought back to life with nothing more than a $30 set of brushes or a $50 bearing kit.
Finding the Right Replacement Parts
Once you've pinpointed the culprit, the hunt for the right replacement part begins. Your motor will have a data plate or sticker on its housing that lists the model and serial number. This little tag is your golden ticket.
Snap a clear photo of that tag and write the numbers down. With this info in hand, you can confidently search online golf cart part suppliers. Look for the parts diagram (or "schematic") for your specific motor. This ensures you order the exact brushes, bearings, or end caps you need, saving you the headache and cost of getting a part that's just "close enough."
Repair vs. Replace: The Economic Decision
This is the crossroads every DIYer reaches: does it make more sense to fix this thing, or should I just get a new or rebuilt motor? There’s no universal answer—it really boils down to the extent of the damage and what your budget looks like.
If you are leaning toward a full replacement, it’s a good chance to see if an upgrade makes sense. You can learn more about how to choose the best electric motor for a golf cart and potentially gain some extra speed or torque.
To make the decision easier, here’s a practical cost breakdown I often refer to.
Cost Breakdown: Repairing vs. Replacing Your Motor
Deciding whether to perform surgery on your old motor or swap it out can be tough. The table below compares the typical costs and labor involved for common repairs versus buying a new or rebuilt unit. It should give you a clearer picture of which path makes the most financial sense for your situation.
| Component or Repair Type | Average Part Cost | Estimated DIY Labor Time | When This Option Makes Sense |
|---|---|---|---|
| Brush Replacement | $25 - $50 | 1-2 Hours | If brushes are the only worn item and the commutator is in good shape. |
| Bearing Replacement | $40 - $80 | 2-4 Hours | If the motor is noisy but electrically sound. Requires a bearing puller. |
| Full Rebuild Kit | $100 - $200 | 3-5 Hours | For an older motor showing multiple signs of wear but has a good armature. |
| Rebuilt Motor | $400 - $700 | 1-2 Hours | When the armature is bad, as it's often the most expensive single part. |
| New Motor | $600 - $1,200+ | 1-2 Hours | For catastrophic failure or when upgrading for more speed or torque. |
My rule of thumb is pretty simple: if your total repair costs start creeping toward 50% of the price of a rebuilt motor, it's usually smarter to just get the replacement. A rebuilt unit almost always comes with a warranty and has been professionally vetted, giving you peace of mind that you're starting fresh with a reliable motor.
Putting It All Back Together: Reassembly and Final Checks
Alright, you’ve wrestled with the tough parts—diagnosing the problem and getting your hands dirty with the internal repairs. Now it’s time to put your golf cart motor repair skills to the final test: putting it all back together. Don't rush this part. A single misstep here could send you right back to square one.
Think of it like surgery in reverse. Every washer, bolt, and wire has its own special home. This is where those photos you snapped during disassembly become your best friend.
Assembling the Motor Casing
Let's start by gently sliding the armature back into the motor housing. If you swapped out the bearings, triple-check that they’re perfectly seated on the shaft and snug in their housing. One of the most common mistakes I see is someone trying to force a bearing into place, which can ruin it before it ever gets a chance to spin.
Next up are your new brushes. Make sure they can slide freely in their holders and that the springs are pushing them firmly and evenly against the commutator. Before you tighten those long through-bolts, line up the "witness marks" you made on the motor casing and end caps. This ensures a perfect alignment.
Pro Tip: When you're tightening the motor casing bolts, use a star pattern, just like you would when changing a tire. This distributes the pressure evenly and stops the end caps from warping, which could cause the whole armature to bind up.
Reinstalling the Motor and Hooking Up the Cables
With the motor buttoned up, it’s time to get it back in the cart. These things are heavier than they look, so get a solid grip or, better yet, grab a friend to help. Line up the motor shaft with the differential spline, slide it home, and then secure the mounting bolts.
Now, pull out your labeled photos to reconnect those hefty high-amperage cables. This is a mission-critical step. Hooking up a cable to the wrong terminal can instantly cook your controller or the motor itself. Make sure every connection is clean, tight, and secure. A loose connection on one of these cables can generate a ton of heat, potentially melting the terminal and creating a serious fire hazard.
Properly reassembling major components is non-negotiable for safety and performance. If you've been working on the power delivery system, a guide on Mastering Contactor Installation can be a lifesaver.
The Moment of Truth: Initial Power-Up and System Checks
Before you drop the cart off the jack stands and zip away, we need to run a few cautious final checks. Go ahead and reconnect the main battery pack. When you make that final connection, do it with a firm, quick motion to keep any potential sparks to a minimum.
Leave the cart securely on the jack stands and flip it into "Maintenance" or "Tow" mode. This keeps the speed and torque low for a safe first test run.
Walk through this checklist:
- Turn the Key: First, turn the ignition on. You should hear the solenoid click when you press the pedal. That little click is a good sign that your primary circuit is alive and well.
- Check Forward and Reverse: Gently press the accelerator. The wheels should start spinning smoothly in the direction you’ve selected. Be sure to test both forward and reverse to confirm your wiring is spot-on.
- Listen for Trouble: Pay close attention. Are you hearing any grinding, whining, or clunking sounds? A happy, healthy motor should run quiet and smooth. Any weird noises are a red flag—stop immediately and find out what’s going on.
- Feel the Heat: Let the motor run for a minute or two with no load on it. Carefully touch the motor casing. It’s normal for it to get warm, but it should never be scorching hot to the touch.
This careful verification process is your best insurance against reassembly mistakes that could cause some real, expensive damage.
Once all your checks are complete and the cart is running like a top on the stands, go ahead and lower it down. Take it for a gentle test drive on flat ground before you really open it up on the course.
Your Top Questions About Golf Cart Motor Repair
Getting into a golf cart motor repair for the first time always stirs up a few questions. Let's tackle some of the most common ones we hear from guys out in the garage, so you can make the right calls and avoid some classic mistakes.
Is it My Motor or the Controller?
This is the big one. It’s probably the trickiest part of the whole diagnostic process, and getting it wrong can cost you. You need to know for sure if the motor is toast or if the controller is the real villain here.
The best way to figure this out is a field test. You’ll need to safely bypass the controller and hook the motor's main terminals directly to your battery pack.
If that motor spins to life, you’ve got your answer—the problem is almost certainly somewhere else, like the controller, solenoid, or even the wiring between them. But if it just sits there, silent, then you’ve confirmed the motor itself is the dead component. Always, and I mean always, have your cart’s service manual handy to identify the right terminals before you try this.
Key Insight: Don't jump to conclusions and assume the most expensive part is the problem. A simple bypass test takes five minutes but can save you hundreds of dollars by making sure you're replacing the right part.
Can I Upgrade My Motor While I'm at It?
You bet. In fact, if you’re already pulling the old motor, it’s the perfect time to think about an upgrade. Swapping in a high-performance model for more hill-climbing torque or a little extra top-end speed is a really popular move.
Just remember this: a beefier motor is going to pull more juice. You have to make sure your controller, solenoid, and high-amperage cables are up to the task. If you drop a powerful new motor in without upgrading the supporting cast, you’re just asking for overheating and a quick death for your entire electrical system.
What's the First Thing to Break Inside a Motor?
Far and away, the motor brushes are the number one failure point in a standard DC golf cart motor. Think of them as a wear-and-tear item, like brake pads on a car. They're just little carbon blocks that press against the commutator to get electricity flowing.
Over hundreds of hours, they simply wear down. Once they get too short, they can't make good contact, and you'll notice sluggish performance, power that cuts in and out, or a motor that just flat-out refuses to run. The upside? They’re one of the cheapest and easiest parts to replace.
Ready to make your walk on the course effortless? The Caddie Wheel transforms your standard push cart with powerful, quiet electric assistance. Enjoy your round without the fatigue. Learn more about the Caddie Wheel.
Partager:
A Golfer's Guide to the Battery Gauge for Golf Cart
Best Golf Cart Battery Charger: Your Ultimate Guide to Safe, Efficient Power