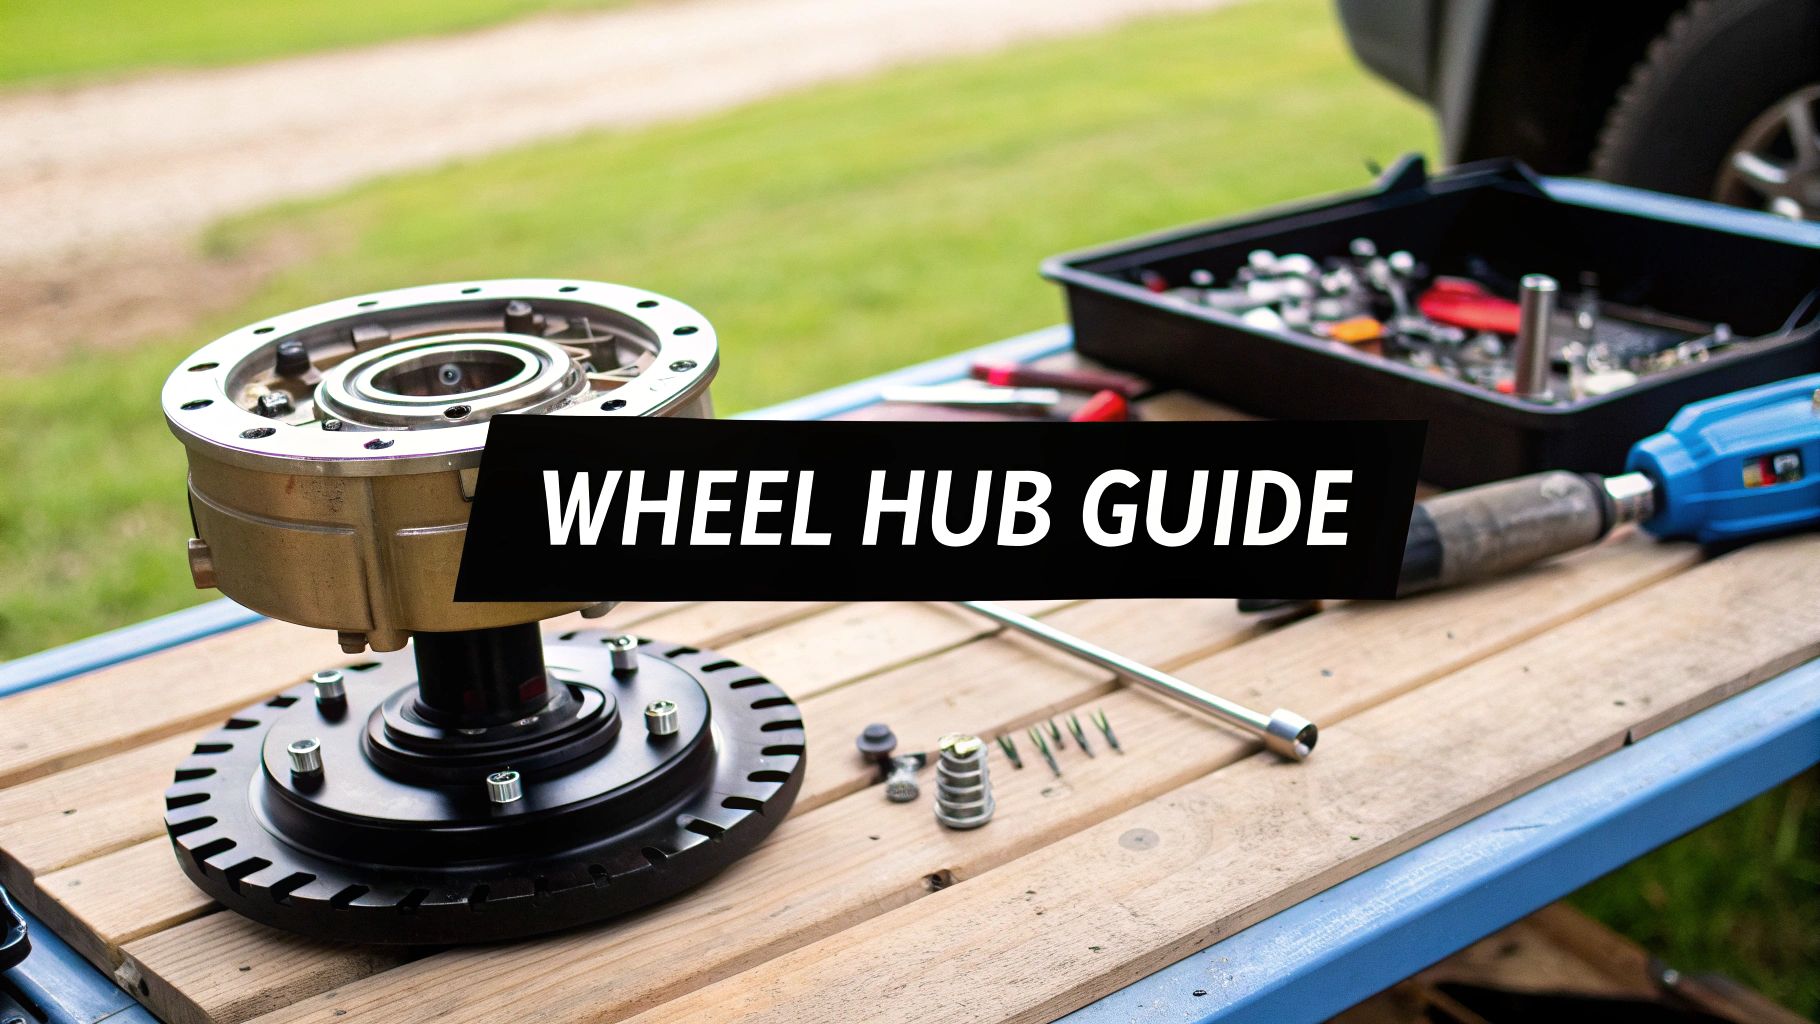
Think of a golf cart's wheel hub assembly as the unsung hero of your ride. It’s the critical piece that connects your wheel to the axle, packed with bearings that let everything spin smoothly. Without it, you’re not going anywhere. More importantly, it supports the cart's weight and makes sure your trip is safe and comfortable. If you start hearing a weird humming or grinding noise from one of your wheels, that’s your hub assembly crying for help.
What a Wheel Hub Assembly Does for Your Golf Cart

Before you even think about grabbing a wrench, it pays to understand what this part actually does. This isn't just a hunk of metal; it’s a precisely engineered unit that handles a few vital jobs. Its main purpose is to securely mount the wheel to your golf cart while allowing it to rotate with almost zero friction.
Think of it as the rotating anchor point for each wheel. It carries the entire load on that corner of the cart, whether you're cruising down a fairway or zipping along a paved community path. A faulty hub means the wheel can't spin right, which quickly leads to poor performance and, honestly, some pretty serious safety hazards.
The Core Components of a Hub Assembly
A standard golf cart wheel hub assembly is made up of several key parts working together. While the design might differ a bit between major brands like EZGO, Club Car, and Yamaha, the fundamental anatomy is pretty much the same.
- The Hub: This is the main body, a solid metal casting that holds all the other components. It’s also where you'll find the threaded studs for mounting your wheel.
- Wheel Bearings: These are the real MVPs, allowing the hub to spin effortlessly around the axle spindle. Most modern carts use sealed bearing units that don't require any maintenance.
- Wheel Studs: These are the threaded bolts pressed into the hub that your lug nuts screw onto, holding the wheel firmly in place.
- Flange: This is the flat, circular face of the hub where the wheel actually mounts, connecting the spinning part to the stationary axle.
Knowing these parts helps you pinpoint problems. For example, that humming noise almost always points to worn-out bearings. If the wheel feels wobbly, it could just be loose lug nuts, but it could also be a more serious issue like damaged studs.
Recognizing the Telltale Signs of Failure
A failing hub assembly rarely gives out without a warning. If you can learn to spot these early symptoms, you can avoid a catastrophic failure—like a wheel deciding to part ways with your cart while you're moving. The most common sign, by far, is a strange noise coming from one of the wheels.
Key Takeaway: A low humming or growling sound that gets louder as you pick up speed is the classic sign of a bad wheel bearing inside the hub. If that noise turns into a grinding or clicking, the situation is critical. You should stop driving the cart immediately.
Other signs to watch for include:
- Excessive Play or Wobble: If you can safely jack up the cart and wiggle the wheel side-to-side or top-to-bottom, the hub bearings are probably shot.
- Vibration: A failing hub can cause vibrations you can feel through the steering wheel or the floor of the cart.
- Uneven Tire Wear: While a few different issues can cause this, a bad hub can definitely lead to weird wear patterns on the tire it's connected to.
The demand for reliable components like these is growing right alongside the golf cart market itself. The global golf cart market was valued at around USD 2.06 billion in 2024 and is expected to hit USD 3.21 billion by 2033. This growth just goes to show how important high-quality, durable parts are for both recreational and utility carts. You can find out more about the trends shaping the golf cart industry.
How to Select the Right Hub Assembly for Your Cart
Picking out a new wheel hub assembly for your golf cart isn't like grabbing a part off a shelf and hoping for the best. A wrong choice isn't just an inconvenience; it can lead to frustrating vibrations, premature wear, or even a dangerous failure when you're cruising around the neighborhood. Nailing the selection process is the key to keeping your cart running safely and smoothly for years.
The absolute first thing you need to do—before you even open a new browser tab to start shopping—is to pin down your cart's make, model, and year. A hub for a Club Car DS is worlds apart from one meant for a Yamaha Drive2. Manufacturers are notorious for making small but critical tweaks between model years, so having this info ready isn't just a suggestion, it's a requirement.
Sealed vs. Serviceable Bearings
With your cart's identity confirmed, your next major decision is whether to go with sealed or serviceable bearings. Most carts from the last decade or so will come standard with sealed hub assemblies, and for good reason.
- Sealed Hub Assemblies: Think of these as the "install it and forget it" option. The bearings are greased and sealed for life at the factory, keeping them protected from the dirt, water, and grime that can kill a bearing. The downside? When a bearing eventually fails, the whole unit gets replaced.
- Serviceable Hub Assemblies: You'll find these more often on older carts or some heavy-duty utility models. They give you the option to replace individual bearings and seals. While they can be more cost-effective to repair down the road, they demand regular maintenance—that means cleaning and repacking the bearings with fresh grease.
For the average golfer or neighborhood cruiser, a sealed hub is the way to go. It’s reliable and saves you from a messy job. But if you’re running a workhorse utility cart through mud and muck all day, a serviceable hub might give you a better long-term repair advantage.
Measuring Key Specifications for a Perfect Fit
Okay, you know your cart and you've picked your bearing type. Now it's time to get your hands dirty and confirm the physical specs. There are two measurements you absolutely cannot get wrong: the bolt pattern and the axle spline count.
The bolt pattern is all about the number of wheel studs and the circle they sit on. The most common pattern you'll see is 4x4 (four lugs on a four-inch diameter circle), but don't ever assume. You have to measure to ensure your wheels will actually bolt up to the new hub.
For rear wheels, the spline count is just as critical. The splines are the little teeth on the axle shaft that lock into the hub, transferring power from the motor to the wheels. You’ll need to physically count the splines on your axle to make sure the new hub assembly will slide on and engage correctly.
A mismatched spline count means the hub simply won't install, or worse, it could strip the axle, leading to a much more expensive repair. Always double-check the product description for the correct spline count for your model.
Knowing how to get these measurements right is a fundamental part of wheel maintenance. To brush up on the basics, check out our guide on how to measure wheel diameter accurately.
Hub Assembly Compatibility Checklist for Major Golf Cart Brands
To make things a bit easier, here’s a quick-reference table outlining the common specs for major golf cart brands. This should give you a solid starting point, but always, always double-check against your specific cart’s year and model before buying.
| Golf Cart Brand/Model | Common Bolt Pattern (e.g., 4x4) | Typical Spline Count (Front/Rear) | Key Notes (e.g., Year-specific changes) |
|---|---|---|---|
| Club Car DS / Precedent | 4x4 | Rear: 24 or 30 Spline | Pre-2003 models often use a 30-spline hub. Post-2003 typically uses a 24-spline. |
| EZGO TXT / RXV | 4x4 | Rear: 24 Spline (Fine) | RXV models may have specific hub requirements for their AC drive system. |
| Yamaha Drive/Drive2 | 4x4 | Rear: 30 Spline | G-series models (G1-G22) can vary; always verify spline count. |
| Star EV | 4x4 | Rear: Varies (often 19 or 24) | High variability between models. Physical count is essential. |
| Cushman / Utility | 4x4 or 5-lug | Varies widely | Heavy-duty models may have different bolt patterns and spline counts. |
Remember, this chart is a guide, not a guarantee. Manufacturing changes happen, so confirming the specs on your own cart is the only way to be 100% sure you’re getting the right part.
Special Considerations for Modified Carts
Is your cart lifted? Rolling on oversized tires? Pushing more power through an upgraded motor? If you've modified your cart, a standard, off-the-shelf hub might not cut it. These upgrades put way more stress on the wheel bearings and the entire hub assembly.
This is where performance hubs come in. They’re built with heavier-duty bearings and stronger materials designed to handle that extra load. Spending a little more on an upgraded hub now can save you from a catastrophic failure later and keep your custom ride safe. To get a better handle on component choices, it's worth understanding OEM replacement parts and how they compare to aftermarket performance options.
The push for better, more durable components is growing right alongside the golf cart accessories market. Valued at USD 377 million in 2024, the market is expanding steadily, with the United States alone making up 91% of the revenue share. This boom is driven by the explosion of golf carts in planned communities and resorts, fueling the demand for reliable parts like high-quality wheel hub assemblies.
Your Practical Hub Assembly Replacement Guide
Alright, you've got the correct golf cart wheel hub assembly in hand, so it's time to get down to business. This guide will walk you through the whole replacement process, focusing on the practical steps and real-world tips I've learned over the years that make the job go smoothly. We'll cover everything from workshop prep to the final torque, ensuring your cart is safe and ready to roll.
Before a single bolt is turned, your first priority is always safety and preparation. Trust me, rushing this stage is a recipe for disaster. You don't need a professional garage, but you do need a solid, level surface to work on and the right tools for the job. When tackling hub replacements or any significant repair, a well-organized automotive workshop environment makes a world of difference for both efficiency and safety.
Gearing Up for the Job
Gathering your tools before you start is one of the best things you can do to avoid frustrating interruptions. You’re going to be dealing with some tight bolts and heavy parts, so having the right equipment is non-negotiable.
Here’s your essential checklist:
- A Solid Floor Jack: That little scissor jack that came with your cart? It's for emergencies only. A good floor jack provides the stability you need.
- Jack Stands (At Least Two): Never, ever work under a vehicle supported only by a jack. This is the single most critical safety rule.
- A Lug Wrench or Impact Wrench: This will make getting the wheel off much, much faster.
- A Socket Set and Ratchet: You'll need a variety of sizes for the hub nut and any brake components.
- Torque Wrench: This is not optional. Getting the torque right on the axle nut and lug nuts is absolutely crucial for your safety.
- Pliers (Needle-Nose and Standard): You'll need these to wrestle with that pesky cotter pin.
- A Rubber Mallet or Dead Blow Hammer: Perfect for gently persuading a stuck hub to come loose without causing damage.
- Brake Cleaner and Shop Towels: Essential for cleaning the spindle and surrounding parts before the new hub goes on.
- New Cotter Pin: Always use a new one. They're single-use items designed to deform for a reason.
Having everything laid out and within arm's reach transforms a potentially frustrating task into a manageable weekend project.
The process of identifying, measuring, and matching your hub is truly the foundation of a successful repair, as this infographic shows.
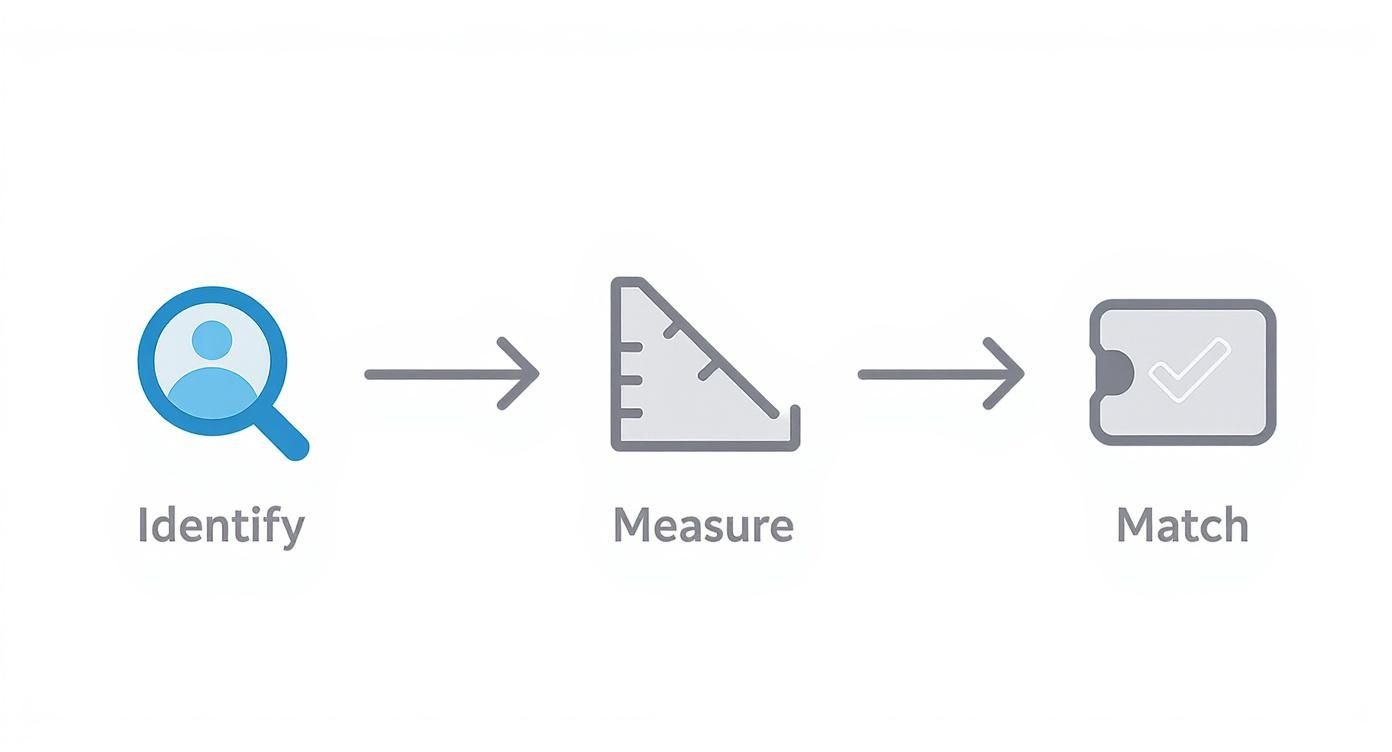
This visual flow really drives home the point that a successful installation starts long before you even pick up a wrench—it begins with correctly identifying and matching the component to your cart's specific needs.
Removing the Old Hub Assembly
With your workspace prepped, let's get that old hub off. A good first step is to loosen the lug nuts on the wheel you're working on while the cart is still on the ground. Don't take them all the way off, just break them free. It's much easier than fighting them when the wheel is in the air.
Next, use your floor jack to lift that corner of the cart until the tire is clear of the ground. Immediately slide a jack stand under a solid point on the frame or the axle for support. Now you can safely remove the lug nuts and pull the wheel off.
You'll be looking right at the old hub assembly. Grab your pliers and straighten out the cotter pin from the axle nut, then pull it out. After that, remove the nut retainer (it looks like a little slotted cap) and the large axle nut itself. This nut can be on there pretty tight, so you might need a breaker bar to get enough leverage.
Pro Tip: If the hub is rusted onto the spindle, don't just start whaling on it with a steel hammer. You can easily damage the spindle threads. Instead, give the back of the hub a few firm taps with a rubber mallet, rotating it as you go. A little penetrating oil sprayed on beforehand can also work wonders.
Once that nut is off, the old hub should slide right off the spindle. It might be a bit stubborn, but a gentle, firm pull is usually all it takes.
Installing the New Hub and Final Checks
Before you even think about sliding the new hub on, take a minute to clean the axle spindle. Use some brake cleaner and a shop towel to wipe away any old grease, dirt, or rust. Give the spindle a good look-over for any burrs or damage that could prevent the new hub from seating properly.
Now, carefully slide your new golf cart wheel hub assembly onto the clean spindle. It should go on smoothly without any force. If it binds up, pull it back off and double-check the spindle for any issues you missed.
Thread the axle nut on by hand until it's snug. This next part is vital, so grab your torque wrench. Overtightening can destroy the new bearings in a hurry, while leaving it too loose will cause a dangerous wheel wobble. You'll need to consult your cart's service manual for the exact torque specification—it's usually in the 80-100 ft-lbs range, but you absolutely must verify this.
After torquing the nut, slide the nut retainer back on and line up one of its slots with the hole in the spindle. Insert a new cotter pin and bend the ends over to lock it in place. That little pin is your final failsafe.
Finally, put the wheel back on, tighten the lug nuts in a star pattern by hand, and lower the cart. Once the wheel is back on the ground, use your torque wrench again to tighten the lug nuts to their specified value, which is typically around 50-60 ft-lbs. This two-step tightening process ensures the wheel is seated evenly and securely. This entire process shares fundamental principles with other cart maintenance tasks, as detailed in this helpful DIY guide to electric golf cart repair.
Working Through Common Hub Installation Problems
Even with the best prep, a golf cart wheel hub replacement can sometimes throw you a curveball. You’ve followed all the steps, but something just isn't lining up. Don't worry, this happens. Let's walk through how to diagnose and fix those frustrating little issues that can pop up, getting you from stuck back to rolling smoothly.
One of the most common snags is getting the new hub onto the spindle. You’ve cleaned it up, but the hub just won’t slide on. Your first instinct might be to grab a bigger hammer, but resist that urge—it’s a fast track to damaging the delicate spindle threads or the brand-new bearing.
Instead, pull the hub back off and take a closer look. Run your fingers carefully over the spindle's surface. You’re feeling for any tiny burrs, nicks, or high spots that could be stopping the hub in its tracks. If you find a rough patch, you can gently smooth it down with a fine-grit metal file. Just be careful to only remove the damaged material and nothing more.
Diagnosing Issues During Installation
Sometimes the spindle is perfect, but the problem is with the new hub. While it’s not common, manufacturing defects can happen. A quick way to check is to see if your old hub slides back on easily. If it does, the issue is almost certainly with the new part.
Here are a few other roadblocks you might hit during the install:
- The Hub Won't Fully Seat: It slides on part-way but then stops dead. This is often caused by a small burr you missed or some rust buildup right at the base of the spindle. A quick scrub with a small wire brush can usually clear it out.
- Splines Don't Align: On a rear wheel, the splines inside the hub might not be lining up with the axle. Don't force it. Instead, gently rotate the hub back and forth as you push it on. This little wiggle is usually all it takes to help the splines mesh together.
- Axle Nut Won't Thread On: This is a major red flag. Stop immediately. It almost always means the hub isn't seated all the way, or worse, you’ve started to cross-thread the nut. Back it off, check the threads on both the spindle and the nut, and make sure the hub is flush before trying again.
The entire wheel hub assembly market, from golf carts to commercial trucks, has seen massive growth driven by the demand for more reliable parts. The market was valued at USD 5.9 billion in 2024 and is expected to jump to USD 13.36 billion by 2032. This trend shows a huge industry focus on creating durable, easy-to-maintain components. You can see the full research on the wheel hub assembly market to get a deeper look at these developments.
Solving Post-Installation Problems
So, you got the hub on, torqued everything down, and took the cart for a spin. But now you’re hearing a new noise or feeling a weird vibration. Don't panic. Most issues that show up after the install are pretty simple to figure out.
The most frequent complaint is a wheel wobble. The first place to look? Your lug nuts. Did you remember to re-torque them after lowering the cart? Loose or unevenly tightened lug nuts are the culprit behind wheel wobble 90% of the time.
Another common issue is a new grinding or humming noise. You replaced the hub to get rid of a noise, but now there's a different one. This often points to brake drag. If you had to move any brake components, they might be slightly misaligned. Jack the cart up again and spin the wheel by hand. If you hear a light, steady scraping sound, your brake pads are probably rubbing against the drum or rotor.
Important Takeaway: Pay close attention to the type of noise. A clicking or popping sound that only happens when you turn is likely a bad CV joint on certain cart models. That’s a completely different issue from a hub bearing noise, which is usually a constant hum or roar that gets louder with speed.
If you've double-checked the lug nuts and brakes but the problem persists, it might be time to consider a defective part. It’s not common with reputable brands, but a new hub assembly can occasionally have a faulty bearing right out of the box. If the wheel still has excessive play after being torqued to spec, you’ll probably need to contact your supplier for a replacement.
To help you pinpoint the issue, here’s a quick diagnostic guide for common problems you might encounter after your installation is complete.
Common Hub Assembly Problems and Solutions
| Symptom (e.g., Grinding Noise) | Potential Cause | How to Fix It |
|---|---|---|
| Wheel Wobble or Vibration | Lug nuts are loose or torqued unevenly. | Lower the cart, loosen the lug nuts, and re-torque them in a star pattern to the manufacturer's specification. |
| Grinding or Humming Noise | The new bearing is faulty, or brake components are dragging. | Spin the wheel while lifted. If it's noisy, the bearing may be bad. If you hear scraping, adjust the brake components. |
| Clicking/Popping When Turning | This is likely a failing CV joint, not the wheel hub. | Inspect the CV axle boots for tears or leaks. This usually requires a separate repair or CV axle replacement. |
| Excessive Wheel Play | The hub assembly is defective or the axle nut is not properly torqued. | Re-check the axle nut torque with a torque wrench. If play persists, the new hub is likely faulty and needs replacement. |
| Burning Smell from Wheel | Brakes are dragging severely, or the bearing is failing and overheating. | Immediately stop driving. Jack up the cart to check for brake drag or an extremely hot hub. Adjust brakes or replace the defective hub. |
Troubleshooting can feel like a process of elimination, but by tackling the most likely causes first, you can usually solve the problem quickly and get back to enjoying your ride.
Long-Term Hub Maintenance for Lasting Performance

Getting your new golf cart wheel hub assembly installed feels like a major victory, but the job isn't quite finished. To get the most out of your repair and ensure it lasts for years, your focus needs to shift from installation to proactive maintenance. A few simple checks, performed regularly, can prevent you from having to do this job all over again down the road.
Think of it as a quick health checkup for your cart's wheels. It doesn't take long, but it’s crucial for catching small problems before they escalate into something that leaves you stranded. Ignoring these checks is like skipping an oil change—everything seems fine until, suddenly, it isn’t.
For the average cart owner, a simple inspection every six months is a great starting point. This routine is all it takes to spot the early warning signs of wear and tear, giving you plenty of time to address them.
Your Essential Inspection Checklist
During your checkup, you’re looking for specific signs that point to a potential issue with the hub assembly. This isn't just a quick glance; it requires a bit of hands-on investigation.
- Look for Grease Leaks: Get a good look at the area around the hub seal, both on the inside and outside of the wheel. Any sign of grease seeping out is a dead giveaway that the seal has failed. Once that happens, dirt and water can get in and contaminate the bearings.
- Check for Wheel Play: Safely jack up the corner of the cart so the tire is off the ground. Grab the tire at the 12 and 6 o'clock positions and try to wiggle it. Any noticeable clicking or side-to-side play is a classic symptom of worn-out bearings.
- Listen While You Spin: With the wheel still in the air, give it a good, hard spin. It should rotate smoothly and quietly. If you hear any rumbling, grinding, or feel roughness, the internal bearings are likely on their way out.
These simple steps give you a clear picture of your hub's health. For a broader view of cart care, you can explore other essential golf cart maintenance tips for 2025 that complement these hub-specific checks.
Adjusting Maintenance for Your Environment
Not all golf carts live the same life. Your maintenance schedule should adapt to how—and where—you use your cart. A cart that only sees light duty on pristine paved paths needs far less attention than one that’s battling the elements every day.
Consider how these factors might affect your cart:
- Coastal or Humid Areas: Salt in the air is incredibly corrosive. If you live near the coast, you should inspect your hubs more frequently—maybe quarterly—to check for rust and ensure the seals are holding up.
- Dusty or Sandy Conditions: Fine particles of sand and dust are the natural enemy of bearings. They can work their way past the seals and turn that clean bearing grease into a gritty, abrasive paste.
- Heavy Use or Hilly Terrain: Carts used for utility work or on courses with lots of hills put significantly more stress on wheel hub assemblies. This increased load accelerates wear, justifying more frequent checks.
A cart used daily in a dusty, agricultural setting might need its serviceable bearings repacked every year, while a casual neighborhood cruiser with a sealed hub may go its entire life without needing a replacement.
Ultimately, taking a proactive approach to maintenance doesn't just extend the life of your new golf cart wheel hub assembly; it ensures your cart remains safe and reliable every single time you turn the key.
Answering Your Top Hub Assembly Questions
When you're digging into a golf cart repair, it's natural for questions about the wheel hub assembly to pop up. Getting straight answers is the key to doing the job right and staying safe on the path. Let's walk through some of the most common questions we see in forums and hear in the shop.
One of the biggest dilemmas cart owners run into is whether to replace just the bearings or the whole hub. The answer really boils down to the age and design of your cart.
Bearings Only or the Full Assembly?
Most modern golf carts, especially any made in the last 15 years or so, come with a sealed hub assembly. On these, the bearings are pressed in and sealed at the factory for a maintenance-free life. It's a great system, but it also means that if a bearing goes bad, you can't just swap it out. The entire golf cart wheel hub assembly has to be replaced as one piece.
Older, vintage carts are a different story. They often have a serviceable hub, which lets you pop out the old bearings and seals and press in fresh ones. This can save you a few bucks on parts, but it's a more labor-intensive job that requires special tools like a bearing press to do correctly.
Quick Inspection Tip: Not sure which one you have? Take a look at the face of the hub. If you see a little dust cap in the center that can be pried off, you've probably got a serviceable hub. If the center is one solid, sealed piece with no cap, it's a modern sealed assembly that needs a full replacement.
Can I Use Car Parts on My Golf Cart?
We hear this one surprisingly often: can a car wheel hub be used on a golf cart? The answer is a hard no. They might look vaguely similar from a distance, but trying to use an automotive part is incredibly dangerous and just won't work.
There are a few critical safety reasons for this:
- Load Ratings: Car hubs are built to handle vehicles weighing thousands of pounds. A golf cart hub is engineered for the much lighter load of a cart, which affects how the bearings manage stress and wear.
- Bolt Patterns: The spacing of the wheel studs on a car hub is almost never the same as on a golf cart. You wouldn't even be able to get your wheel on.
- Spindle Design: A golf cart's axle spindle has a completely different diameter and spline count than a car's. The hub from a car simply won't fit onto the spindle, period.
Trying to rig something up would seriously compromise the entire wheel system of your cart, creating a massive risk of the wheel literally falling off. Always, always use a hub assembly specifically designed for your golf cart's make and model.
How Important Is Axle Nut Torque?
Finally, let's talk about that axle nut. What happens if it's too tight or too loose? This is one of those things that has to be perfect—"close enough" isn't good enough here. Getting the torque right is absolutely essential for both performance and safety.
If you over-tighten the axle nut, you put way too much pressure (or preload) on the brand-new bearings. This creates a ton of friction and heat, which will cook the bearings and cause them to fail in no time—sometimes in just a few miles. You'll be right back where you started, doing the job all over again.
On the other hand, a loose axle nut is even more dangerous. It allows the hub to have too much play, creating a distinct wheel wobble that you'll feel when you drive. Not only does this wobble destroy your tires, but it can also damage the hub, spindle, and wheel. In the worst-case scenario, the wheel could completely detach from the cart while you're driving.
This is exactly why you must use a torque wrench to tighten that axle nut to the manufacturer's exact specification. It's the only way to give the bearings the perfect amount of preload for a long, safe lifespan.
At Caddie Wheel, we believe in making your time on the course as effortless and enjoyable as possible. Upgrade your push cart with our powerful, easy-to-install motorized wheel and walk the course with ease. Learn more and transform your golf game today!
Share:
Your Guide to the All Terrain Golf Cart
The True Cost of Electric Golf Carts Revealed